Design Your Own Lanyard A Complete Guide
Before you even think about colours, fonts, or logos, the most important first step in designing your own lanyard is to nail down its purpose. It sounds simple, but getting this right from the start is what separates a truly effective lanyard from just another strap. Is it for branding, security, or pure convenience? This initial vision will guide every single decision you make down the line.
Starting with a Clear Vision for Your Lanyard
Take a moment to think about the "why" behind your project. A lanyard destined for a high-energy trade show floor has completely different needs than one used for daily staff ID in a quiet office. Getting this clear upfront saves you from costly do-overs and ensures your investment truly pays off.
The environment where the lanyard will be used is everything. A corporate event lanyard, for example, needs to look professional and act as a mini-billboard, putting your brand front and centre around every attendee's neck. On the flip side, a lanyard for a school has to be all about safety and durability.
Matching Function to Your Goals
What will your lanyard actually be holding? A simple ID card, a hefty set of keys, or a bulky electronic pass? The weight and size of the items it needs to carry will directly impact your choice of material, width, and even the type of clip you select later on. A flimsy lanyard won't last a week with heavy use, while an overly chunky one might be overkill for a one-day conference.
To help sharpen your focus, ask yourself a few practical questions:
- Who is this for? Is it for your staff, event guests, students, or customers? The user experience matters.
- Where will it be used? Think about indoor vs. outdoor use, professional settings, or high-activity areas.
- What's the main goal? Is it brand promotion, access control, team identification, or just making life easier?
Answering these questions creates a solid design brief. For instance, a lanyard for a construction site needs to be incredibly durable and must have a safety breakaway. In contrast, one for a VIP event should feel silky and premium, all about creating a sophisticated look.
Choosing the Right Material
Once you know the why, you can start thinking about the what. The material is the foundation of your lanyard, affecting its look, feel, and performance. Getting this right is key to a successful design.
Here’s a quick guide to help you match the right material to your project.
Matching Lanyard Materials to Your Project Goals
A quick comparison of common lanyard materials to help you select the best foundation for your design, budget, and purpose.
| Material | Best For | Printing Method | Feel & Durability |
|---|---|---|---|
| Flat Polyester | Budget-friendly promotions, large events, and general use. A great all-rounder. | Screen Print or Heat Transfer | Smooth, sturdy, and cost-effective. Very durable. |
| Dye Sublimation | Complex, full-colour logos, photo-realistic images, and vibrant branding. | Dye Sublimation | Silky-smooth, premium feel. The print is permanent and won't crack or peel. |
| Woven | Simple, bold text and logos for a classic, embroidered look. | Woven (Stitched in) | Textured, traditional feel. Extremely durable and long-lasting. |
| Nylon | Premium events and corporate branding where a high-sheen, quality look is essential. | Screen Print | Smooth with a noticeable sheen. Feels high-end and is very strong. |
Choosing the material isn't just about looks; it's about making sure your lanyard can do its job day in and day out.
The Rise of Personalised Lanyards
This focus on a purpose-driven design is part of a bigger trend. People want unique, personalised items that reflect their brand's identity perfectly. It's no surprise that the global lanyards market was valued at around USD 65.9 billion in 2023 and is set to keep growing. This boom is fuelled by the demand for custom options that let organisations stand out. You can read more about this market trend to see where things are headed.
Ultimately, when you design your own lanyard, this strategic thinking is the most critical part of the process. It’s what turns a simple accessory into a purpose-built tool that not only looks great but performs flawlessly, setting you up for a smooth project from start to finish.
Selecting the Right Material and Style
So, you're ready to design your own lanyard. Where do you start? The very first decision, and arguably the most important one, is choosing the right material. This isn't just a minor detail; it's the foundation of your entire design. The fabric you pick sets the stage for everything else, from how vibrant your print looks to how the lanyard feels and holds up over time. It’s the canvas for your vision, so let’s get it right.
For many projects we work on here in the UK, durable polyester is the go-to. Think of it as the reliable workhorse of the lanyard world. It’s tough enough for daily wear and tear, which makes it perfect for things like staff IDs or large-scale events. What's more, its smooth surface is a dream for dye-sublimation printing, letting us create stunning, full-colour designs with even the most intricate details.
But what if you're after something with a more premium, corporate feel? That’s where nylon comes in. It has a lovely sheen and a silky-smooth texture that just feels a bit more upmarket. This makes it an excellent choice for VIP events or for any staff who are regularly client-facing. Nylon works best with simpler, bold logos using screen printing, and the result is always sharp and professional.
Considering Width and Eco-Friendly Options
These days, sustainability is a huge factor for many brands, and rightly so. If that sounds like you, eco-friendly materials like bamboo or recycled PET (made from old plastic bottles) are fantastic alternatives. They not only offer a unique texture but also send a powerful message about your company’s green values.
The width of the lanyard itself also plays a surprisingly big part in how much impact your design has. Lanyards typically come in widths ranging from a slim 10mm up to a much more prominent 25mm.
- 15mm: This is a popular, well-balanced choice that’s great for most text and simple logos.
- 20mm: Gives you a bit more real estate, making your branding more visible from a distance.
- 25mm: The best bet when you have complex graphics or when you just want maximum brand exposure.
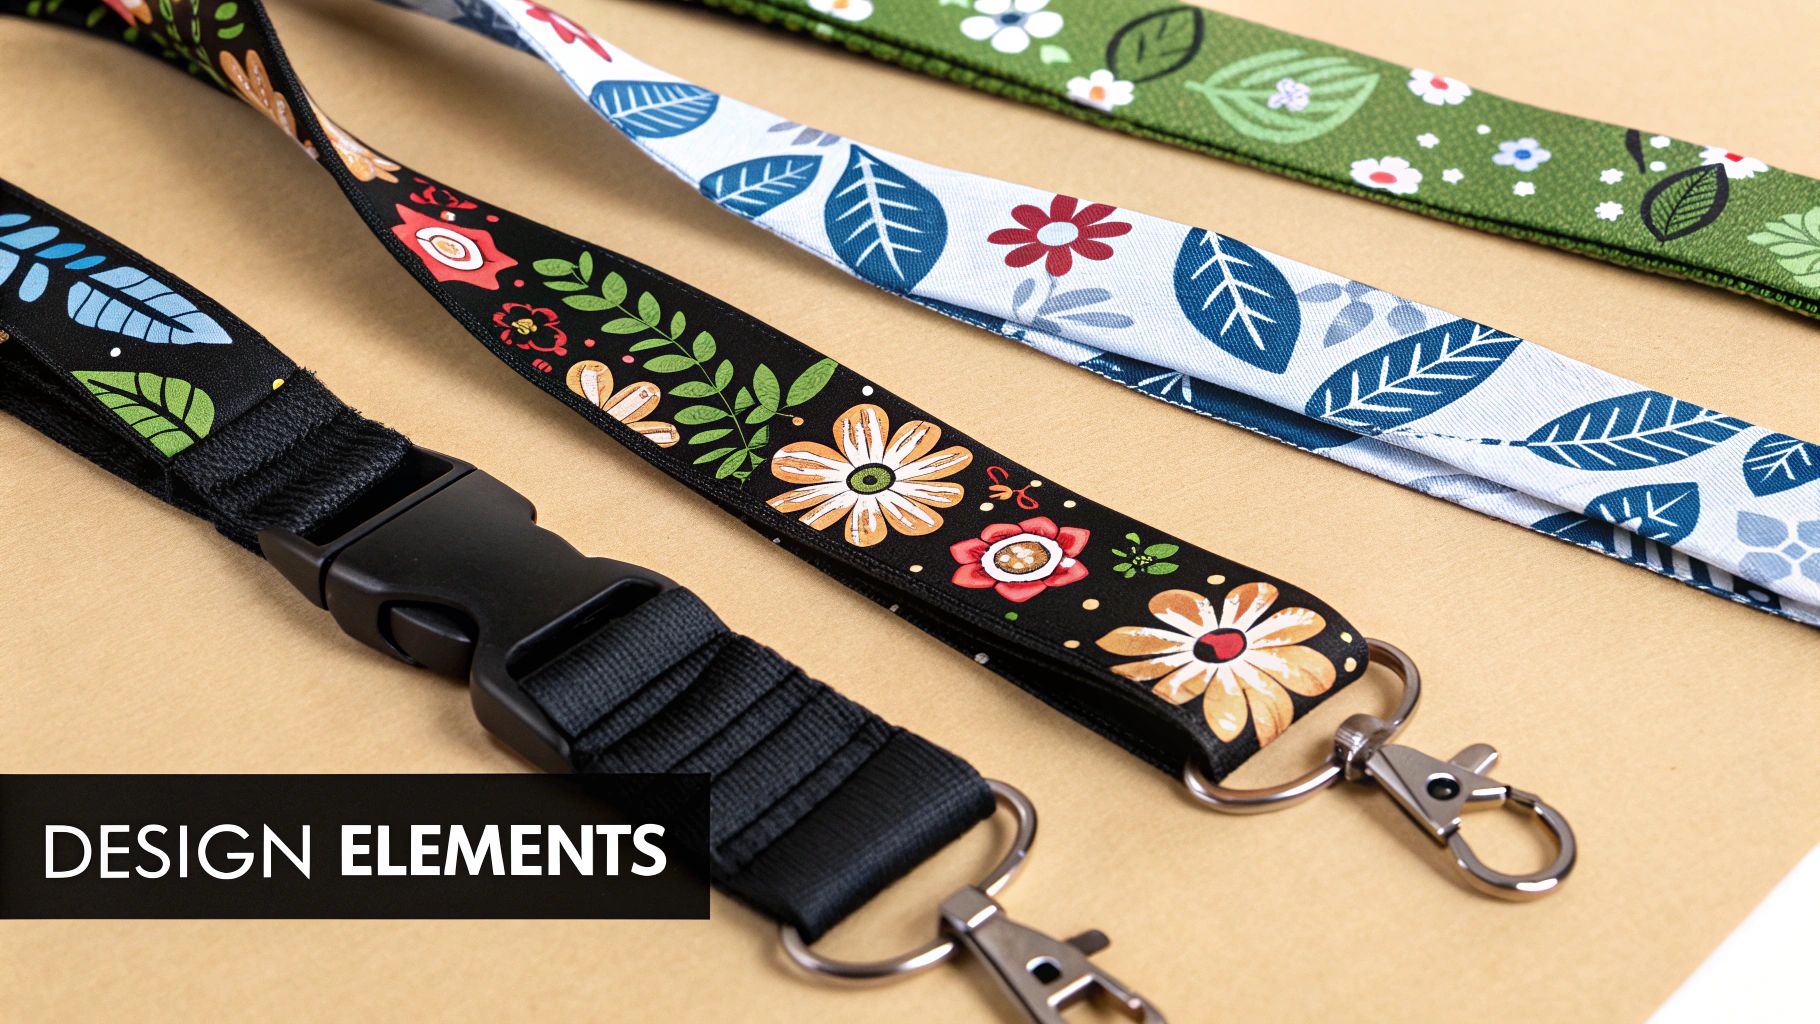
This visual guide shows how the different elements come together in the lanyard design process.
As you can see, it's the combination of the strap material and the hardware that forms the core of your final product.
The Bigger Picture
This kind of attention to detail is all part of a thriving global market. In fact, the lanyards market was recently valued at USD 2.5 billion, and projections show it could climb to USD 3.8 billion by 2033. The UK is a significant part of this, with lanyards being essential for countless events, corporate ID systems, and educational institutions.
Key Takeaway: The material isn't just a detail—it defines the lanyard's character. Polyester offers vibrant visuals, nylon provides a premium touch, and eco-options communicate brand values. Match the material to your purpose.
By carefully thinking through these options, you can strike the perfect balance between aesthetics, budget, and practicality. To really get into the nitty-gritty of each fabric, you might find our detailed guide on available ribbon and lanyard materials helpful. It’ll help you ensure the lanyard you create is perfectly suited for its job, whether that's for a high-end conference or for daily staff use.
Preparing Your Artwork for a Perfect Print
So, you've got a fantastic idea for your lanyard design. That's the exciting part! But turning that brilliant concept into a physical product that looks just as good in your hands as it does on your screen means getting the technical bits right. A stunning design can fall flat if the artwork file isn't set up correctly for printing, often resulting in blurry logos or colours that just look… off.
Getting your digital file in order is the secret to a flawless finish. Trust me, a little prep work here saves a world of hassle later.
Vector vs. Raster: What You Need to Know
The first, and most crucial, thing to get your head around is the difference between vector and raster files. It sounds technical, but it’s quite simple.
Think of a raster image (like a JPG, PNG, or GIF) as a mosaic made of tiny coloured squares, or pixels. It looks great at its original size, but the moment you try to enlarge it, those pixels become visible, making the image look blocky and blurred.
A vector file (usually an AI, EPS, or a proper vector PDF) is entirely different. It’s built from mathematical paths and points. This means it can be scaled to any size you can imagine—from a tiny detail on a ribbon to the side of a bus—and it will always stay perfectly sharp and crisp. This is why we, and any other professional printer, will always ask for your artwork in a vector format. It’s the only way to guarantee your logo and text look sharp and professional on the final fabric.
Nailing the Technical Details
Beyond just the file type, a few other settings need your attention to sidestep common printing pitfalls. Paying attention to these now ensures what you see on your monitor is what you'll get in your delivery.
Here are the absolute essentials to double-check:
- Set Colours to CMYK: Your screen displays colour using an RGB (Red, Green, Blue) light model. Professional printers, however, use CMYK (Cyan, Magenta, Yellow, Black) inks. Always convert your artwork to the CMYK colour space to make sure the printed colours are what you were expecting.
- Convert Fonts to Outlines: If you’ve used a specific or custom font in your design, there’s a good chance the printer won’t have it installed on their system. This can lead to your carefully chosen font being swapped for a default one, which can completely ruin the look. The fix is simple: convert all your text to "outlines" or "curves." This turns the letters into fixed vector shapes that can't be changed.
- Embed Your Images: If your design must include a raster image (like a photo), make sure it’s high-resolution (at least 300 DPI) and properly embedded within your vector file.
A very common slip-up is grabbing a logo from a website and assuming it will print well. These are nearly always low-resolution JPG or PNG files that will look fuzzy and unprofessional on a lanyard. Always track down the original, high-quality vector file from the source.
Your Final Artwork Checklist
Before you hit that 'send' button, take a moment to run through this final checklist. It’s a small step that can save you from a major disappointment when your order arrives. We follow a similar process for our own personalised ribbon printing service to ensure every single detail is spot-on.
| Checklist Item | What to Look For | Why It Matters |
|---|---|---|
| File Format | Is it a vector file? (AI, EPS, PDF) | Guarantees your design can be scaled without quality loss. |
| Colour Mode | Is the file set to CMYK? | Ensures the colours print accurately. |
| Fonts | Are all fonts converted to outlines? | Prevents font substitution errors at the printer's end. |
| Image Resolution | Are raster images at least 300 DPI? | Ensures any non-vector elements are sharp and clear. |
| Bleed Area | Have you used the template's bleed guide? | Stops important parts of your design from being trimmed off. |
Taking those few extra minutes to get your artwork right is the single best thing you can do to make sure your finished lanyards look exactly as you envisioned.
Right, so you’ve got your lanyard’s colour and design sorted. But let’s be honest, the bit that really matters day-to-day is the hardware – the clips and fittings that make it work. A lanyard that looks great but is a pain to use is just a frustrating accessory. The real secret is thinking about how it’s going to be used in the real world.
A classic trigger clip is a brilliant all-rounder. It’s simple, it’s secure, and you can easily work it with one hand. This makes it a go-to choice for things like conference ID cards or staff passes in an office environment. If you need a bit more flexibility, the lobster clip is a great shout. Its wider opening and swivelling base mean it can attach to all sorts of things without getting tangled up.
Matching Clips to Real-World Uses
You need to picture the exact scenario. For instance, if your lanyards are purely for holding keys, nothing beats a sturdy split ring – just like the one you have for your house keys. It’s not built for quick removal, which is precisely the point when you’re trying to prevent keys from getting lost. On the other hand, for a big event where everyone has pre-punched plastic badges, a simple J-hook or dog clip will do the job perfectly.
One of the biggest mistakes I see is people choosing a clip based on looks alone. Just imagine trying to register hundreds of attendees at an event, and they're all struggling with fiddly, complicated clips. Going for something user-friendly, like a trigger or lobster style, makes the entire experience so much smoother for everyone.
Getting the hardware right is what turns a good design into a truly great, practical tool. Always think about the person who will be wearing it and what they'll be doing.
Why Safety Breakaways Are Non-Negotiable
Beyond sheer convenience, safety is a massive consideration, especially in certain workplaces. A safety breakaway is a small plastic clip, usually sitting at the back of the neck, that’s designed to pull apart under force. This simple little feature can prevent serious injury or even choking if the lanyard gets snagged on machinery, a door handle, or is grabbed.
For many organisations, this isn’t a nice-to-have; it's a mandatory part of their health and safety policy.
- Schools and Nurseries: An absolute must to protect children during playtime.
- Hospitals and Care Homes: Keeps staff safe when working around patients and all sorts of medical equipment.
- Factories and Industrial Sites: Essential for preventing horrific accidents involving moving parts.
Adding a safety breakaway shows you’re serious about looking after your people. It’s a small detail that offers huge peace of mind. This focus on durability and safety is a big deal across the industry. To give you an idea, the European fall prevention lanyard market was valued at around $142.7 million USD back in 2021, with the UK having the largest market share. This just goes to show how much emphasis is being placed on high-quality, safe equipment. You can dig deeper into the data on the importance of safety lanyards in this comprehensive market report.
Right, you’ve put in the hard work designing your lanyards, and now it’s time for the final, most crucial part of the journey: placing your order and getting it made. This is where your vision becomes a reality, and a little bit of care at this stage makes all the difference.
When you’re ready to go, you’ll bundle up all your decisions and send them over to a UK supplier like us at Ribbons4u Ltd. You’ll need to send your artwork file and confirm the material, width, and quantity you've settled on. This is also the point to lock in your choice of clips and any extras like safety breakaways. Being crystal clear here helps us get it right the first time, avoiding any back-and-forth.
The All-Important Digital Proof
Before a single lanyard gets printed, we’ll send you a digital proof. This is basically a final preview, an electronic mock-up showing exactly how your finished lanyard will look. It shows the logo placement, the text, the colours—everything. Think of it as your last chance to spot anything that’s not quite right.
Honestly, don’t just give this a quick glance. It’s so much easier (and cheaper!) to fix a typo on a digital file than it is to deal with a box of 500lanyards with a mistake on them. When you design your own lanyard from the ground up, a meticulous check here is non-negotiable.
A rushed approval on a proof with a spelling error or the wrong shade of blue can be a painful and costly mistake. Take a few minutes, grab a cuppa, and give it your full attention.
To make sure everything is spot-on, I always recommend checking these four things methodically:
- Spelling & Grammar: Read every single word out loud. It's amazing how easily your brain can skip over a typo you’ve seen a dozen times.
- Colour Accuracy: Do the colours on the proof match your brand guidelines? While screen colours can vary slightly, the proof should be based on the CMYK or Pantone values you provided.
- Logo & Graphic Placement: Is everything centred and straight? Is any part of the design creeping too close to the edge where it might get cut off?
- Overall Layout: Just take a step back and look at it as a whole. Does it look balanced? Is the text big enough to be easily read from a normal distance?
From Proof to Production
Once you give us the official thumbs-up on the proof, your order is off to the races and joins the production queue. The time it takes from here to delivery can vary a bit. It really depends on the complexity and size of your order. A straightforward screen-printed job, for example, will usually be faster than a large, full-colour dye-sublimation run.
If you’re still a bit unsure about how a particular material feels or looks in person, seeing it for yourself is the best way to feel confident. You can explore our options and request a physical sample to hold in your hand. It’s a small step that ensures the finished lanyards meet your expectations in every way, bringing your project to a smooth and successful close.
Common Questions About Designing Your Lanyard
When you're diving into designing your own lanyard, it's completely normal to have a few questions. I've been helping clients with this for years, and the same queries pop up time and again. Getting these sorted from the start makes the whole process smoother and ensures you end up with a final product you're genuinely happy with.
Let's walk through some of the most common questions we hear. We'll touch on the technical bits, like file formats (it's easier than you think!), and also the practical side of production, from samples to safety features.
What Is the Best File Format for My Lanyard Artwork?
For the absolute best results, you'll want to use a vector file. Think formats like .ai (Adobe Illustrator), .eps, or a vector .pdf. This is always our top recommendation.
Unlike a standard image file like a JPEG, which is made of pixels, vectors are built from mathematical paths. This means you can scale them up or down to any size imaginable—from a tiny logo to a giant banner—and they’ll stay perfectly sharp and clear. It’s the secret behind truly professional, crisp print work.
If all you have is a pixel-based file like a .jpg or .png, it needs to be high-resolution. We're talking at least 300 DPI (dots per inch) at the actual size it will be printed on the lanyard. Even then, many suppliers, including us, will often need to redraw a low-resolution logo into a vector format to guarantee a quality finish. This might come with a small design fee, but it’s well worth it.
"A common pitfall is grabbing a logo straight from a website. These are almost always low-resolution and totally unsuitable for printing. The result? A fuzzy, unprofessional-looking lanyard. Always try to get the original vector file from your designer or marketing department first."
Can I Get a Physical Sample Before My Main Order?
This is a great question. For most custom lanyard orders, what you'll receive isn't a physical sample but a detailed digital proof or 'mock-up'. This is a critical checkpoint in our process.
The digital proof is a precise visual of how your design will look on the finished product. It's your chance to double-check everything—colours, spelling, logo placement, the whole lot—before giving us the thumbs-up to start production. Your approval is what officially sends the order to the manufacturing floor.
While physical pre-production samples are sometimes possible, they are typically reserved for very large or unusually complex orders. Honestly, for standard quantities, they aren't very cost-effective and add a significant amount of time to the project. The digital proof is the industry-standard way to ensure accuracy while keeping things moving efficiently.
What Is a Safety Breakaway and Is It Necessary?
A safety breakaway is a small plastic clip, usually fitted at the back of the neck, designed to snap open under force. It’s a simple but brilliant feature that prevents choking or injury if the lanyard gets snagged or pulled.
We highly recommend it for nearly all uses, and in many settings, it's actually a mandatory safety requirement.
- Schools and Nurseries: An absolute must for protecting children during playtime and daily activities.
- Hospitals and Healthcare Facilities: Keeps staff safe from potential accidents when working with patients or moving equipment.
- Factories and Industrial Sites: A non-negotiable feature where machinery poses a risk of entanglement.
Adding a safety breakaway is an easy and inexpensive way to show you care about the wearer's well-being.
What Is the Typical Minimum Order for Custom Lanyards?
Minimum Order Quantities (MOQs) do vary from one supplier to another. For fully customised lanyards, where the material is printed and assembled specifically for your design, the MOQ usually starts around 50 or 100 units.
There’s a good reason for this. The setup for printing, cutting, and assembling your lanyards involves fixed costs and labour. Spreading these initial setup costs over a very small batch just isn't economical for anyone.
Some places might offer to print on pre-made, plain lanyards for smaller orders, but you'll be limited in your customisation—usually just a single-colour print on a restricted choice of lanyard colours. It's always best to check the MOQ with your chosen supplier before you get too far into the design process, just to make sure your project is feasible.
Ready to bring your vision to life? At Ribbons4u Ltd, we specialise in creating high-quality, fully customised lanyards that make a statement. From corporate events to staff IDs, we're here to help you every step of the way. Explore our bespoke options and start your design today


 Facebook
 Twitter
 Pinterest