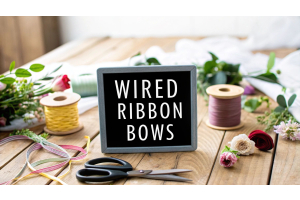
7 Creative Christmas Tree Ribbon Ideas for 2025
The humble ribbon is the unsung hero of festive decor, capable of transforming any Christmas tree from simply decorated to truly spectacular. It weaves colour, texture, and movement through the branches, tying the entire aesthetic together with a polished, professional finish. Yet, knowing precisely how to apply it can often feel like the most daunting part of decorating. Are you aiming for a classic, uniform spiral, a dramatic vertical cascade, or a rustic, homespun feel that looks effortlessly chic?
This year, move beyond the ordinary and explore fresh techniques that will make your tree the stunning centrepiece it deserves to be. This guide delivers a curated collection of actionable Christmas tree ribbon ideas, designed to elevate your decorating skills. We will unpack seven distinct methods, from the elegant Cascading Waterfall to the sophisticated Layered Ribbon Technique. Each idea includes detailed steps, practical tips, and specific guidance on choosing the perfect materials to bring your unique vision to life. Whether you're a small business creating a festive display or a crafter perfecting your home decor, you'll find the inspiration and clear instructions needed to create your most memorable tree yet. Let's begin.
1. Cascading Waterfall Ribbon
The Cascading Waterfall is a sophisticated and elegant technique that elevates Christmas tree decorating to a professional level. This style involves draping ribbons vertically from the top of the tree downwards, creating the illusion of a graceful, flowing waterfall. Unlike horizontal wrapping, this method adds a sense of height, movement, and refined drama, making it one of the most visually stunning Christmas tree ribbon ideas available. Popularised by high-end interior decorators and lifestyle publications, it brings a touch of luxury often seen in hotel lobbies and premium retail displays right into your home or event space.
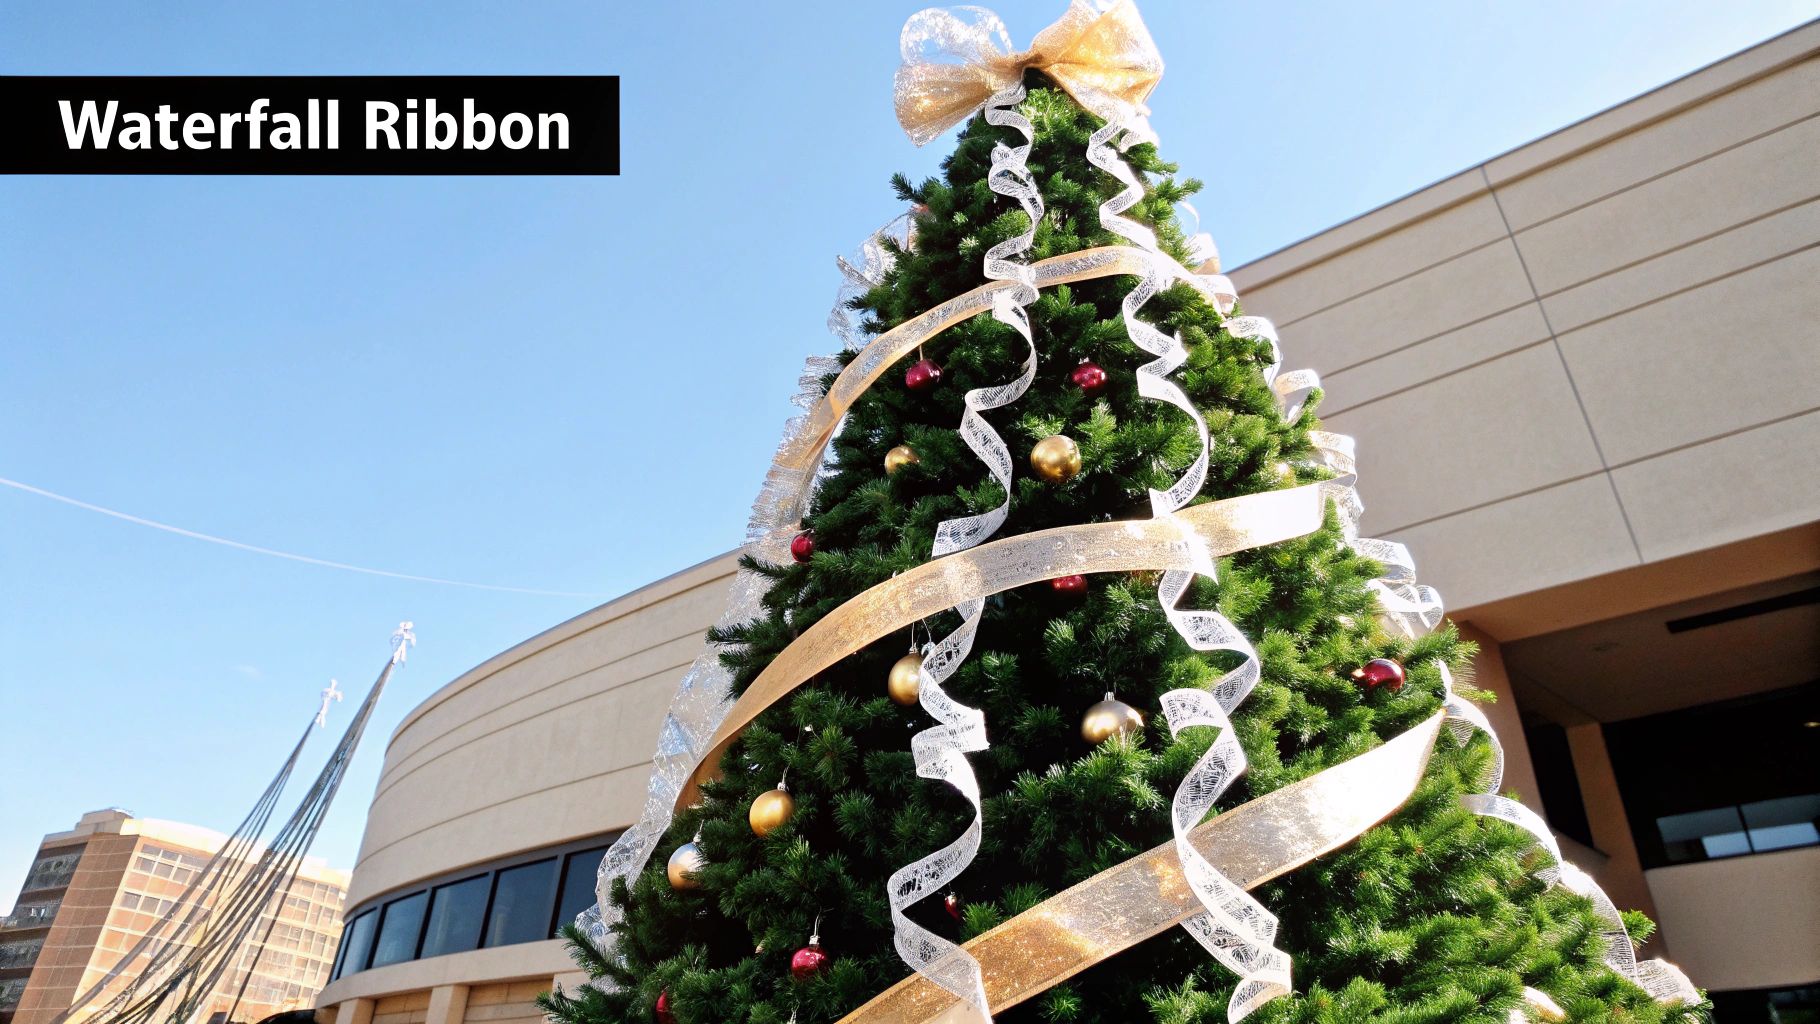
This method is particularly effective for creating a cohesive and polished look. By drawing the eye vertically, the waterfall technique makes trees appear taller and more majestic, making it an excellent choice for rooms with high ceilings or for businesses wanting to make a grand impression.
How to Achieve the Look
Creating the perfect cascade requires a bit of technique, but the results are well worth the effort. The key is to create soft, natural-looking billows rather than straight, rigid lines.
- Start at the Top: Begin by securing several long strips of ribbon to the top of the tree, just beneath your tree topper. You can use floral wire, pipe cleaners, or specialised tree clips to attach them securely to a strong upper branch.
- Create Gentle Billows: Guide each ribbon strip downwards. About 30-45 cm down, gently tuck the ribbon into a branch, pushing it inwards to create a soft, billowing "pouf." This prevents the ribbon from just hanging flat.
- Continue and Vary: Continue this tucking process as you move down the tree, creating two to four billows per ribbon strip depending on your tree's height. Allow the ribbons to flow naturally, varying the length of the cascades and the spacing between the tucks for a more organic appearance.
- Finish the Ends: Let the ribbons trail off near the bottom of the tree. You can cut the ends at a sharp angle (a dovetail or "v" cut) for a professional finish.
Pro Tip: For a fuller, more luxurious effect, layer two different ribbons together. Pair a wide, solid-coloured ribbon with a narrower, patterned, or sheer one. Hold them together and treat them as a single strip as you create your cascades.
2. Spiral Wrap Technique
The Spiral Wrap Technique is a timeless and foundational method for decorating a Christmas tree with ribbon. This classic approach involves winding ribbon in a continuous, flowing spiral from the top of the tree to the bottom, creating a sense of unity and structure. It’s a versatile look that can appear either traditional and cosy or sleek and modern, depending on the ribbon chosen. Popularised by traditional American Christmas decorating and frequently seen in department store displays, this technique is one of the most beloved and recognisable Christmas tree ribbon ideas, acting as a perfect base layer for other ornaments.
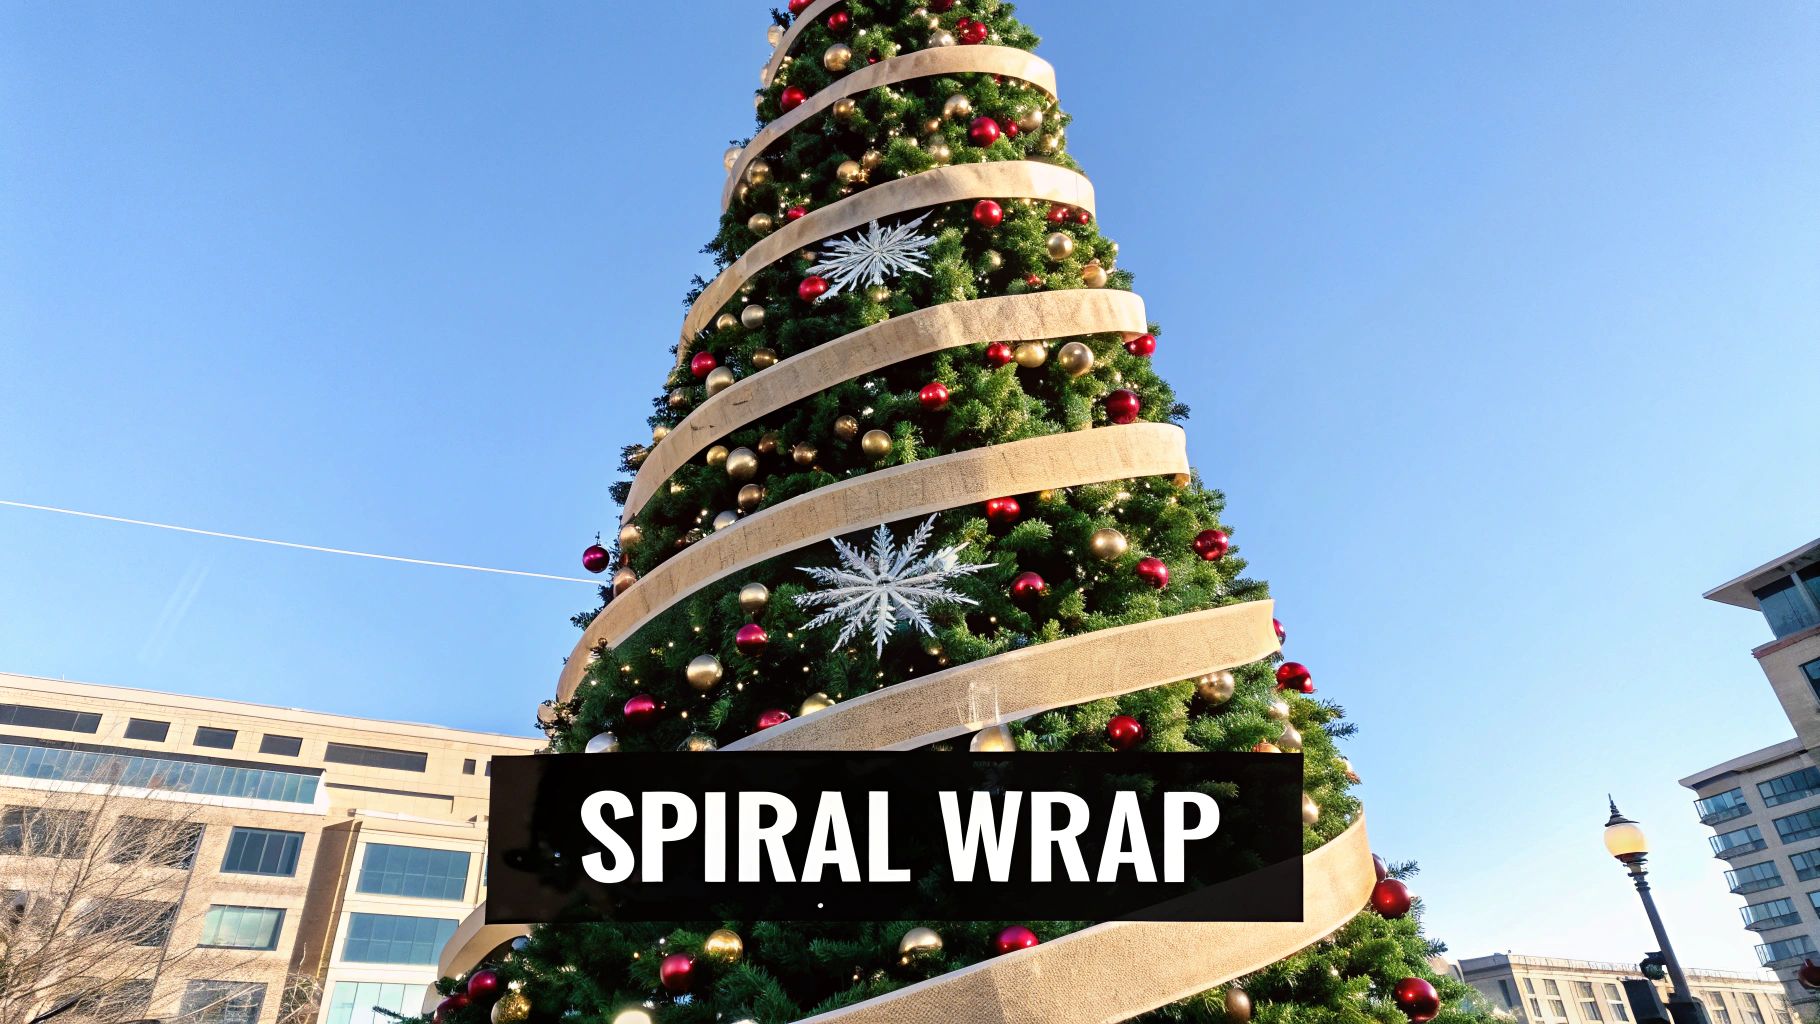
This method is exceptionally effective for creating a balanced and harmonious design. The diagonal lines of the spiral gently guide the eye around the entire tree, ensuring that every angle is visually appealing. It’s an ideal choice for businesses, marketing companies, and event organisers looking to create a full, polished, and professional-looking tree that feels both complete and welcoming.
How to Achieve the Look
Mastering the spiral wrap is straightforward and provides a fantastic framework for the rest of your decorations. The goal is to achieve even spacing and a gentle drape that enhances the tree's natural shape.
- Secure the Start: Begin at the very top of the tree, tucking the end of your ribbon securely around the central stem or a sturdy upper branch, just below where your tree topper will sit.
- Work Your Way Down: Gently unspool the ribbon, wrapping it around the tree at a slight downward angle. As you go, lightly tuck the ribbon into the branches every so often to give it some depth and prevent it from slipping or looking too flat.
- Maintain Consistent Spacing: The key to a professional spiral is consistency. Aim to keep the distance between each loop of the ribbon relatively uniform as you descend the tree. This creates a neat, organised pattern that ties the whole look together.
- Finish Neatly: Once you reach the bottom, cut the ribbon from the spool and discreetly tuck the end deep into a lower branch to hide it from view.
Pro Tip: As a general guideline, plan for approximately 9 feet (about 2.7 metres) of ribbon for every vertical foot of your tree. For a richer, more textured appearance, try layering two different ribbons. A wide, wired ribbon paired with a thinner, decorative one works beautifully for this technique.
3. Bow Cluster Method
The Bow Cluster Method is a charming and impactful technique that turns ribbon into statement-making ornaments. Instead of wrapping or cascading ribbon, this approach involves creating multiple decorative bows of varying sizes and strategically placing them throughout the tree as focal points. This method adds incredible texture, volume, and a touch of traditional elegance, drawing the eye to specific areas and breaking up the monotony of standard baubles. Popularised by Southern American decorating traditions and widely celebrated in craft and DIY communities, it offers a beautifully organised yet handcrafted feel.
This style is particularly effective for those wanting to create a lush, full-looking tree with a strong thematic element. It's a cornerstone of country, rustic, and farmhouse aesthetics, but it can be adapted to more modern designs by using ribbons with contemporary patterns or metallic finishes. The bows act as larger, foundational decorations that you can build the rest of your ornament scheme around.
How to Achieve the Look
Creating a balanced and visually pleasing bow cluster arrangement is all about thoughtful placement and proportion. The goal is to make the bows look like a natural and integral part of the tree's design.
- Create Your Bows: Pre-make all your bows before you start decorating. For a cohesive look, create them in three distinct sizes: large, medium, and small. Using a bow-making tool can help ensure they are all uniform and professionally finished.
- Establish a Hierarchy: Start by placing the largest bows deep within the branches towards the bottom and centre of the tree. This grounds the design and adds depth. Next, add the medium-sized bows throughout the middle section of the tree, filling in major gaps.
- Add Finishing Touches: Use the smallest bows near the top and on the tips of outer branches. This creates a sense of visual balance, drawing the eye upwards and adding delicate final details.
- Secure Firmly: Attach each bow securely using floral wire. Push the wire deep into the branch and twist it tightly to ensure the bows don't droop or fall off, especially on artificial trees.
Pro Tip: Don't be afraid to mix textures. Combine a matte burlap ribbon with a shiny satin or a flocked velvet ribbon in the same bow. This layering adds dimension and visual interest, making each cluster a unique decorative piece.
For a quick reference, the following infographic summarises the ideal placement strategy based on bow size.

This hierarchical approach ensures the tree looks balanced and intentional, making it one of the most structured yet creative Christmas tree ribbon ideas for a polished, professional finish.
4. Layered Ribbon Technique
The Layered Ribbon Technique is a sophisticated method used by professional designers to create extraordinary depth, texture, and visual interest. This approach involves combining multiple types, colours, or patterns of ribbon, layering them one on top of another to build a rich, multi-dimensional look. By strategically stacking different ribbons, you can transform a standard tree into a curated masterpiece, making it one of the most customisable Christmas tree ribbon ideas for achieving a high-end, designer aesthetic. This method is frequently seen in luxury hotel lobbies and high-end retail displays, where intricate detail is paramount.
This technique is exceptionally effective for developing a complex colour scheme or reinforcing a specific theme, such as a rustic woodland or a glamorous art deco style. Layering allows you to weave in multiple colours and textures without making the tree look cluttered, resulting in a cohesive and opulent finish.
How to Achieve the Look
Mastering the art of layering is about balance and thoughtful combination. The goal is to create a harmonious blend where each ribbon complements the others without competing for attention.
- Choose Your Ribbons: Select three to five different ribbons that vary in width, texture, and pattern but share a cohesive colour palette. A common combination is a wide, solid base ribbon, a medium-width patterned ribbon, and a narrow, shimmery or sheer accent ribbon.
- Layer and Secure: Place the ribbons on top of one another, usually with the widest at the bottom. You can either wrap them around the tree horizontally or apply them in vertical cascades. Secure the layered bundle to branches at regular intervals using floral wire.
- Create Dimension: As you secure the layers, gently separate them between anchor points. Allow the top ribbons to pouf out slightly more than the bottom ones, or twist them individually to reveal the different patterns and textures underneath.
- Finish with Flourish: At the end of each ribbon run, cut the tails at an angle or into a dovetail shape. You can also curl the ends of wired ribbons to create elegant spirals at the bottom of the tree.
Pro Tip: When choosing your ribbons, test the combinations in good lighting before you start. Place them next to an ornament to ensure the colours and textures work well together. Using an odd number of ribbons, like three or five, often creates the most visually pleasing and balanced result.
5. Ombre Ribbon Gradient
The Ombre Ribbon Gradient is a contemporary and artistic technique that brings a high-fashion, modern aesthetic to Christmas tree decorating. This style involves using multiple ribbons in graduated shades to create a seamless colour transition from the top of the tree to the bottom. The result is a visually striking and sophisticated look that turns the tree into a true centrepiece, much like a piece of modern art. Popularised by social media influencers and contemporary interior designers, this method is one of the most unique Christmas tree ribbon ideas for those seeking a bold, organised, and polished design.
This method is perfect for creating a deliberate and impactful colour story. By guiding the eye smoothly down the tree, the ombre effect provides a stunning, cohesive backdrop that makes metallic or single-colour ornaments pop. It is an excellent choice for modern homes, event spaces, or businesses wanting to showcase a trend-forward and memorable holiday display.
How to Achieve the Look
Creating a flawless ombre gradient requires careful planning and precise execution, but the breathtaking outcome is worth the effort. The goal is to make the colour shift appear natural and fluid.
- Plan Your Colour Progression: Decide on your colour family (e.g., blues, pinks, golds) and select five to seven distinct shades, moving from the lightest to the darkest. Arrange them in order before you start.
- Divide the Tree into Sections: Mentally or with temporary markers, divide your tree into horizontal sections, one for each ribbon colour. The lightest shade will go at the top, and the darkest at the bottom.
- Wrap Horizontally: Starting with your lightest ribbon at the top, wrap it around the tree within its designated section. When you reach the end of that section, discreetly tuck and secure the end of the ribbon into the tree.
- Blend the Transitions: Begin the next, slightly darker ribbon where the previous one left off. To create a seamless blend, slightly overlap the new colour with the old one for one or two rotations around the tree. Repeat this process for each colour until you reach the bottom.
Pro Tip: Lighting can dramatically affect how colours appear. Before you begin, drape your chosen ribbons on the tree and view them under your planned Christmas lighting to ensure the gradient flows as you envisioned. Adjust shades if needed. For a high-sheen effect that catches the light beautifully, explore options like high-quality satin ribbons to enhance the gradient.
6. Rustic Burlap and Natural Elements
The Rustic Burlap and Natural Elements style brings a warm, earthy, and homespun charm to holiday decorating. This technique moves away from glitter and shine, instead embracing texture and organic materials to create a cozy, farmhouse-inspired aesthetic. By using ribbons made of burlap, jute, or linen, this approach evokes a sense of nostalgia and simplicity. Popularised by the farmhouse decorating trend and featured in publications like Country Living, it is one of the most inviting Christmas tree ribbon ideas for creating a relaxed and welcoming atmosphere.
This method is perfect for anyone wanting to achieve a 'cabin in the woods' or country-style look. Its strength lies in its authenticity and texture, making the tree feel grounded and connected to nature. It is an excellent choice for family homes, cabins, or businesses like florists and gift shops aiming for a handcrafted, artisanal feel in their seasonal displays.
How to Achieve the Look
Creating a rustic look is all about layering natural textures and embracing imperfection. The goal is to make the tree look effortlessly styled and full of character.
- Choose Your Ribbon: Start with a wide burlap ribbon as your base. You can wrap it horizontally around the tree, weaving it in and out of the branches, or create large, loose bows to tuck into gaps.
- Layer with Twine or Jute: For added dimension, loosely wrap thinner materials like jute twine or hemp rope over the burlap or alongside it. This layering of different natural fibres is key to achieving a rich, textured look.
- Create Simple Bows: Instead of elaborate, perfect bows, tie simple, rustic bows and use their tails to cascade down the branches. Don't worry about making them all identical; variation adds to the charm.
- Incorporate Natural Elements: Secure small pine cones, sprigs of dried berries, or cinnamon sticks directly onto the ribbon or nearby branches using floral wire. This enhances the organic, woodland theme.
Pro Tip: To prevent burlap from fraying excessively, lightly spray the cut edges with a clear acrylic sealer or run a thin bead of craft glue along them. This helps maintain a tidy look while preserving the rustic texture. Explore different styles and find quality materials by checking out a wide range of burlap ribbons on ribbonsforyou.com.
7. Metallic Glamour Ribbon
The Metallic Glamour approach uses lustrous ribbons in gold, silver, copper, and rose gold to create an opulent and sophisticated Christmas tree. This style focuses on shimmer and light reflection, turning the tree into a dazzling centrepiece that exudes luxury. Unlike more rustic or traditional themes, this method aims for a high-end, polished aesthetic, making it one of the most glamorous Christmas tree ribbon ideas for a modern home. Popularised by luxury event planners and upscale retail visual merchandisers, it brings the dramatic flair of a formal gala or a high-end hotel lobby into your festive decor.
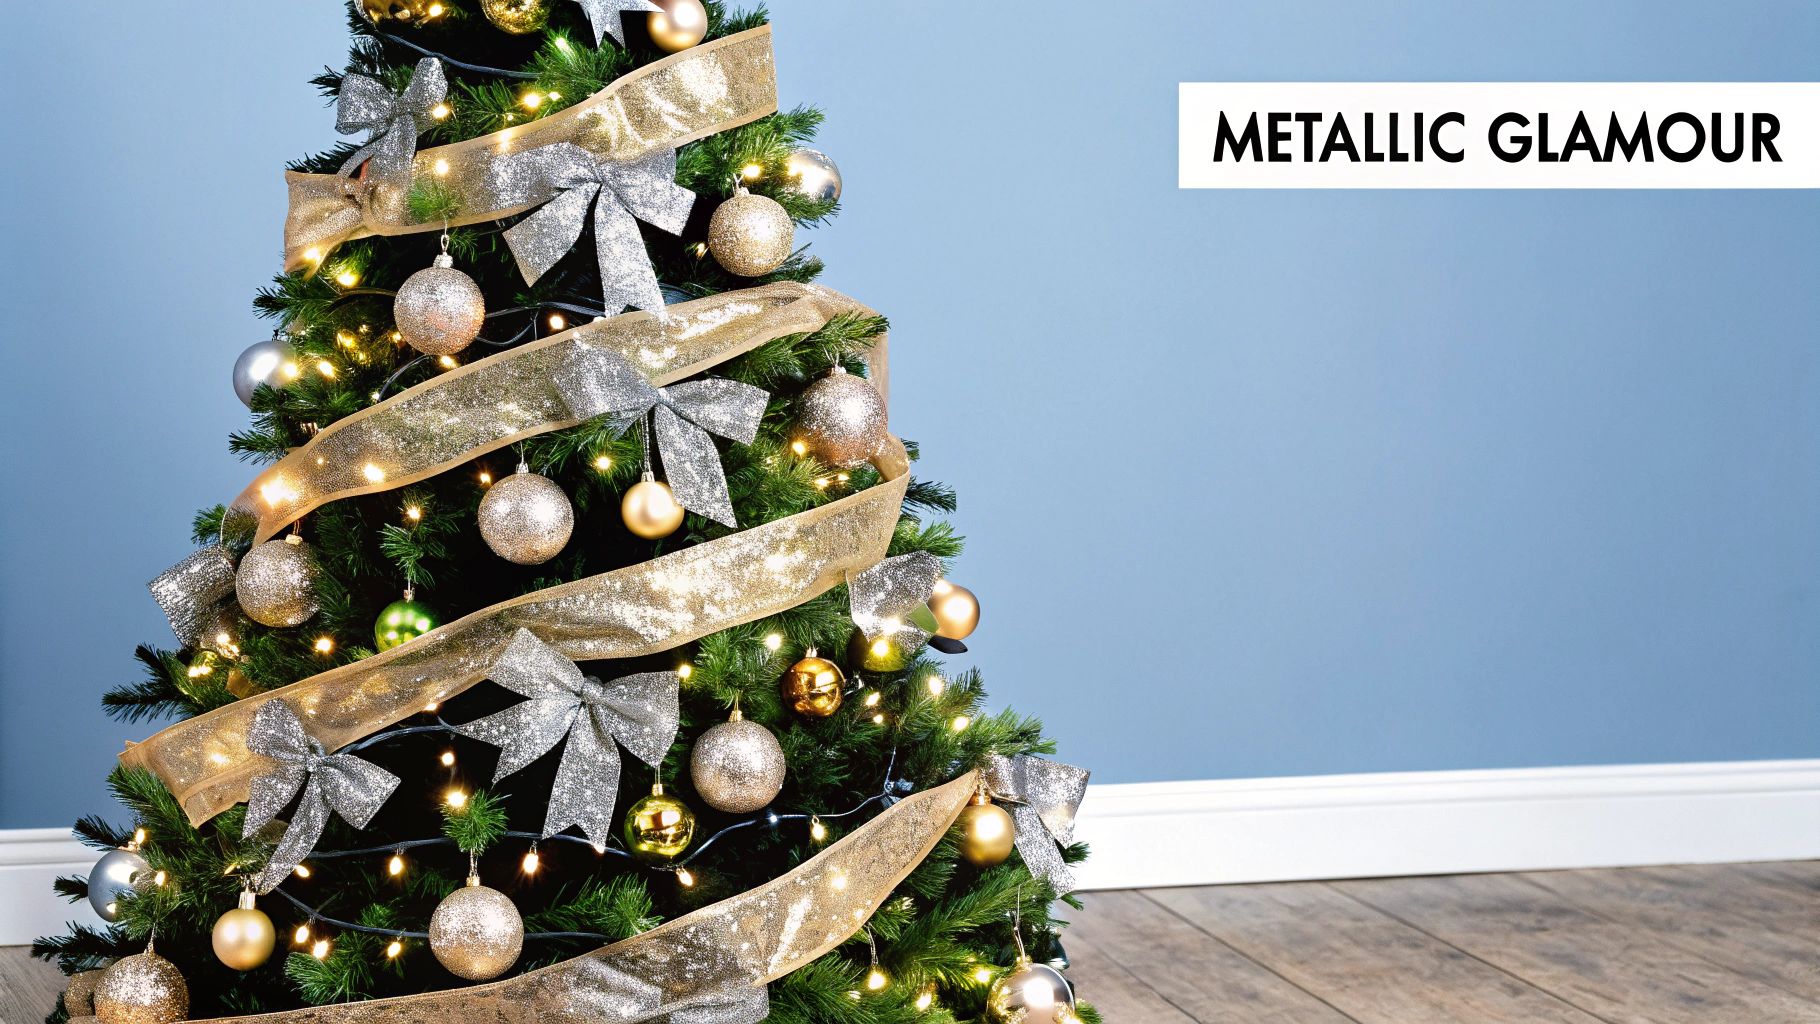
This method is particularly effective for creating an atmosphere of elegance and celebration. The metallic surfaces catch and reflect the tree's lights, creating a dynamic, sparkling effect that adds depth and dimension. It is an ideal choice for formal living areas, corporate event spaces, or any setting where a chic, celebratory statement is desired.
How to Achieve the Look
Creating a metallic masterpiece is all about layering textures and tones to maximise the reflective qualities of the ribbon. The key is to let the ribbon's natural shine do the work.
- Choose Your Palette: Select one primary metallic colour like gold or silver, or mix two to three complementary tones such as rose gold and copper for a warmer, more complex look. A variety of finishes, from matte satin metallic to glittered lamé, will add visual interest.
- Wrap or Weave: Gently wrap the metallic ribbon around the tree, tucking it deep into the branches every so often to create soft, voluminous loops. Alternatively, you can create large, loose bows and attach them to prominent branches throughout the tree for bold, reflective accents.
- Layer for Depth: Use a wide, solid metallic ribbon as your base. Then, layer a narrower, more delicate metallic ribbon on top. This creates a richer, more curated appearance. For a wide selection, you can explore various lamé and metallic Christmas ribbons online to find the perfect combination.
- Coordinate with Ornaments: Pair the ribbons with ornaments in complementary finishes, such as mirrored baubles, crystal icicles, and beaded garlands, to enhance the overall shimmering effect.
Pro Tip: Use warm white LED lights with metallic ribbons. The warm glow will bring out the richness in gold and copper tones and give silver a brilliant, clean sparkle, creating a far more inviting and luxurious ambience than cool white lights.
Christmas Tree Ribbon Ideas Comparison
| Technique | Implementation Complexity ???? | Resource Requirements ⚡ | Expected Outcomes ???? | Ideal Use Cases ???? | Key Advantages ⭐ |
|---|---|---|---|---|---|
| Cascading Waterfall Ribbon | Low | Low - uses less ribbon | Elegant, sophisticated, creates depth and movement | High-end events, weddings, luxury retail | Easy to install, cost-effective, complements ornaments |
| Spiral Wrap Technique | Medium | High - significant ribbon needed | Uniform coverage, classic base for decor | Traditional homes, department stores, corporate offices | Timeless look, symmetrical, good for all tree sizes |
| Bow Cluster Method | High | Medium - multiple bows | Dramatic focal points, textured volume | Southern US, craft fairs, farmhouse style | Highly customizable, easy to rearrange, impactful |
| Layered Ribbon Technique | High | High - multiple ribbon types | Luxurious, rich visual depth | High-end interiors, luxury hotels, event planning | Versatile, sophisticated, multiple themes |
| Ombre Ribbon Gradient | Medium | Medium - specific gradient ribbons | Modern, artistic, seamless color flow | Modern art galleries, influencer homes, contemporary design | Unique aesthetic, photogenic, complements any scheme |
| Rustic Burlap & Natural Elements | Low | Low - natural materials | Cozy, warm, textured rustic look | Farmhouse, cabins, outdoor porches | Cost-effective, eco-friendly, easy to work with |
| Metallic Glamour Ribbon | Medium | Medium to High - metallic ribbon | Opulent, glamorous, reflective shimmer | Luxury hotels, upscale retail, formal settings | Elegant, enhances lights, photogenic, formal appeal |
Tying It All Together for a Stunning Finish
With a full spool of inspiration at your disposal, you are now equipped to transform your Christmas tree from a simple decoration into a breathtaking holiday centrepiece. We have explored a diverse range of Christmas tree ribbon ideas, each offering a unique aesthetic and a different approach to styling. From the elegant, free-flowing lines of the Cascading Waterfall to the classic, structured beauty of the Spiral Wrap, the techniques detailed in this guide provide a solid foundation for your creative vision.
The true magic, however, lies in understanding how these methods can be adapted to suit your personal style and existing décor. The Bow Clustermethod, for example, is perfect for adding concentrated bursts of colour and texture, while the Layered Ribbon Technique allows for a sophisticated interplay of different materials, such as combining sheer organza with luxurious velvet for added depth and dimension.
Key Takeaways for Flawless Execution
As you embark on your decorating journey, keep these core principles in mind to ensure a polished and professional finish:
- Proportion is Paramount: Always select a ribbon width that complements the size of your tree. A two-inch ribbon might be lost on a towering ten-foot fir, while a six-inch ribbon could easily overwhelm a smaller tabletop tree.
- Embrace Texture: Don’t be afraid to mix materials. Pairing the raw, organic feel of the Rustic Burlap style with the dazzling shine of the Metallic Glamour technique can create a stunning and unexpected visual contrast that is uniquely yours.
- Colour Tells a Story: Your colour palette sets the entire mood. Whether you opt for the subtle, sophisticated shift of an Ombre Ribbon Gradientor a bold, traditional red and gold, ensure your ribbon colours harmonise with your ornaments and other decorations.
- Technique is a Guideline, Not a Rule: The most memorable designs often come from creative experimentation. Try combining a spiral wrap as your base layer with cascading ribbon tails for a multi-dimensional effect. The possibilities are truly endless.
Ultimately, mastering these Christmas tree ribbon ideas is about more than just following steps; it's about unlocking your creative potential. The right ribbon and technique can unify a disparate collection of ornaments, introduce a new colour scheme, and add a layer of texture and movement that brings the entire tree to life. This attention to detail elevates your holiday display, creating a warm, inviting, and truly memorable atmosphere for your family, friends, or customers.
Now, take a moment to review the styles that resonated most with you. Consider the colours, textures, and overall feeling you want to evoke this Christmas. With your chosen technique in hand and a vision in mind, you are ready to create a tree that is not just decorated, but beautifully and thoughtfully designed. Happy decorating!
Ready to bring your stunning Christmas tree ribbon ideas to life with premium materials? Explore the award-winning collection at Ribbons4u Ltd, where you'll find an extensive selection of high-quality satin, velvet, organza, and speciality ribbons perfect for any design. Visit Ribbons4u Ltd to find the perfect ribbon to complete your festive masterpiece.


 Facebook
 Twitter
 Pinterest