Decorating Trees with Ribbon for Christmas Guide
If you've ever found yourself admiring a perfectly decorated Christmas tree and wondering what the secret is, I'll let you in on a little designer trick: it's all about the ribbon. Far more than just another accessory, ribbon is a powerful tool that weaves in colour, texture, and movement, pulling your entire holiday theme together in a way that baubles alone simply can't. A bit of ribbon can genuinely take your tree from nice to a stunning, professionally styled centrepiece.
Why Ribbon Is Your Tree's Secret Weapon
 That polished, cohesive look you see in magazines? It's almost always down to the masterful use of ribbon. It’s the single element that can connect everything, creating a display that’s not just pretty, but visually captivating.
Ribbon does more than just look festive; it gives your decorations a solid structural and aesthetic foundation. For me, it’s the best friend of any artificial tree, brilliant for hiding those inevitable sparse patches, and it adds incredible depth to a real one. The right ribbon makes your colour scheme pop, tying together the lights, ornaments, and even the décor of the room itself.
A Tradition with Timeless Appeal
Decorating trees with ribbon has a surprisingly rich history here in the UK. The tradition really took off in the Victorian era, borrowing from even earlier German customs. While trees in the 16th century were decorated with more natural bits and bobs, ribbons quickly became a festive and versatile alternative.
Once the Industrial Revolution made them widely available, they became a fixture. By 1880, manufactured ribbons were a staple in British shops, cementing their place in our Christmas traditions. If you're interested in the history, these Christmas tree statistics and their history are a fascinating read.
It’s no wonder they’ve remained so popular. Ribbon gives you so much creative freedom. Just think about what it offers:
- Visual Flow: It naturally guides your eye around the tree, creating a lovely sense of graceful movement.
- Added Texture: Materials like velvet, satin, or even a rustic burlap introduce a tactile richness that contrasts beautifully with shiny baubles.
- Colour Unification: It acts as the main colour thread, making sure your chosen palette flows consistently from the top of the tree right down to the bottom.
Ribbon is the ultimate gap-filler and theme-setter. It provides that lush, layered look that elevates a tree's design, making it appear fuller and more thoughtfully curated without needing hundreds of extra ornaments.
By getting the hang of a few simple techniques, you can harness the power of ribbon to create a tree that looks like it's been styled by a pro. In this guide, I’ll walk you through everything you need to know to get started.
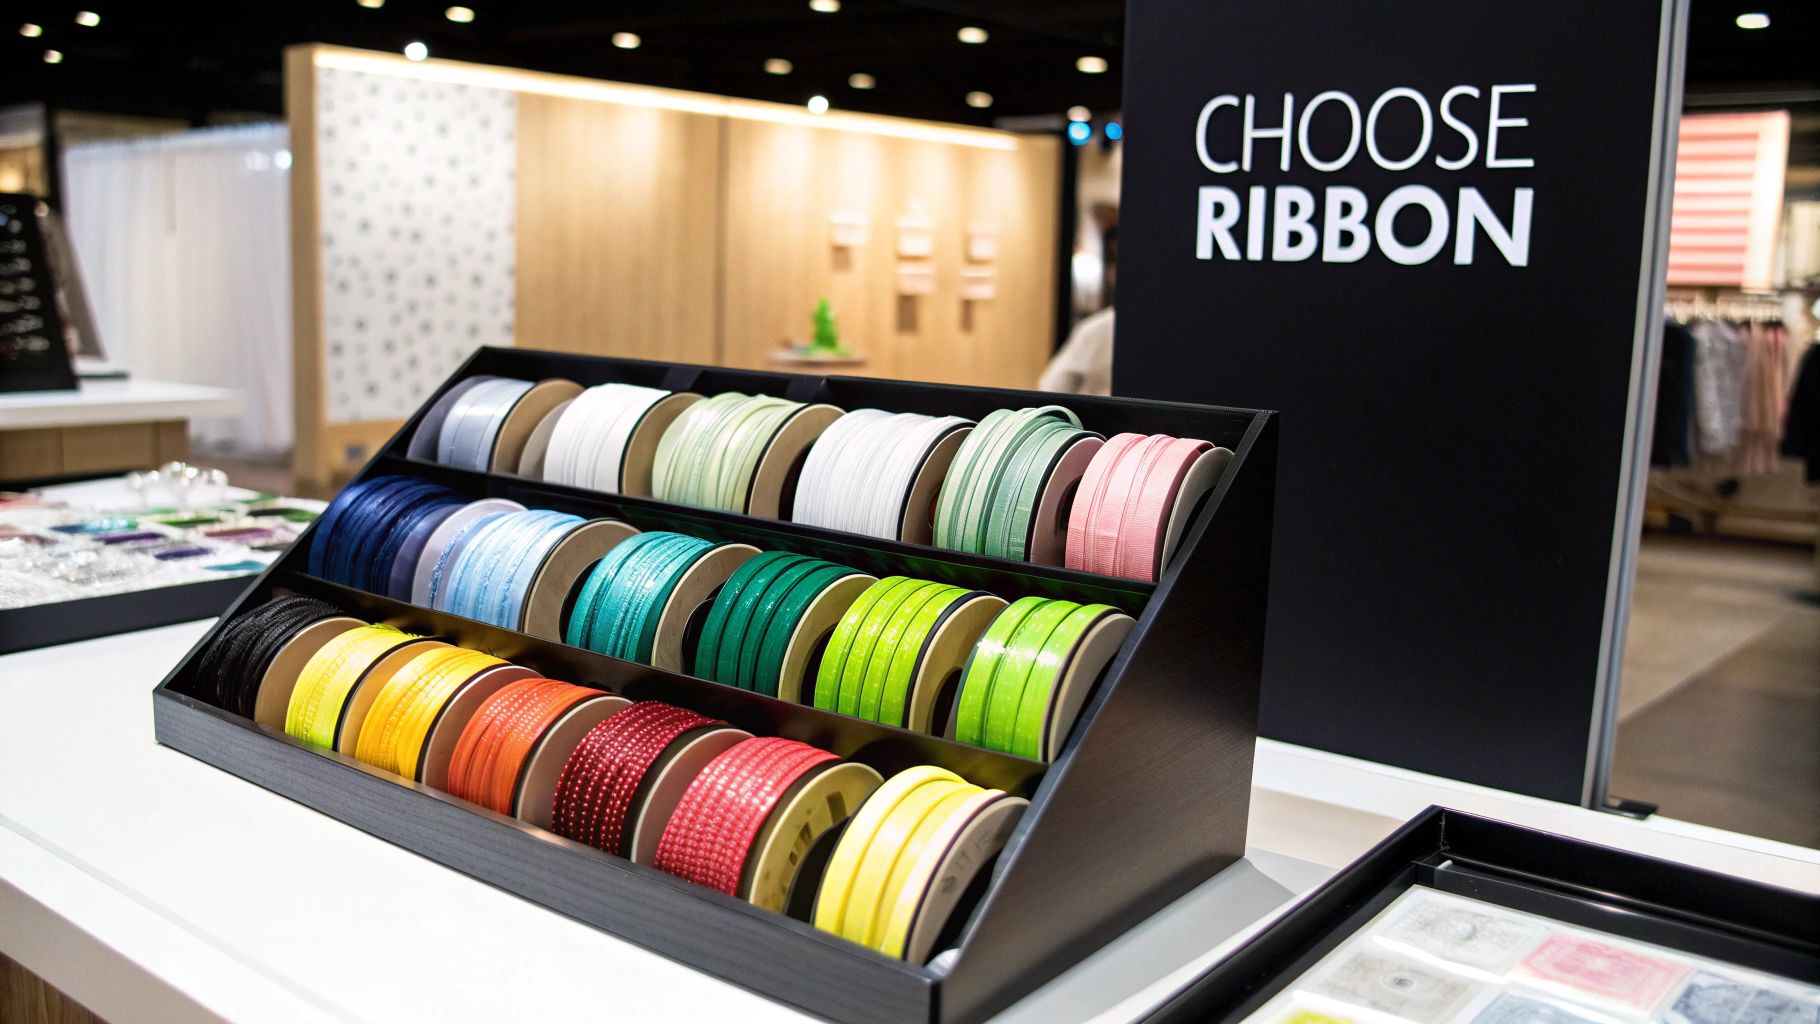
Choosing the Right Ribbon for Your Tree
The first step to a beautifully decorated Christmas tree happens long before you hang a single bauble. It all starts with the ribbon. This one choice can set the entire tone for your tree, guiding it towards luxurious and traditional, or something more rustic and charming. Get this right, and you're well on your way to a stunning final look.
The material you choose plays a massive part in the overall aesthetic. Velvet brings a certain classic warmth, while burlap offers that cosy, farmhouse feel. If you're after a bit of glamour, a shimmering organza or satin ribbon is perfect for catching the fairy lights.
But for sheer versatility and ease of use, you really can’t go wrong with wired ribbon. The fine wire hidden along the edges is a game-changer. It gives you complete control, letting you craft full-bodied loops and elegant cascades that hold their shape beautifully from the top of the tree to the bottom.
Consider Ribbon Width and Texture
The width of your ribbon has a huge impact on its visual weight. Wider ribbons, usually around 6 to 10 cm (2.5 to 4 inches), make a bold statement. They’re fantastic for filling out larger trees or creating a dramatic, flowing effect, acting as a strong visual anchor for your whole design.
Thinner ribbons, on the other hand, create a more delicate and layered look. They are perfect for:
- Creating contrast: Try pairing a wide, solid-colour ribbon with a thin, glittery one for a bit of extra depth.
- Wrapping smaller trees: A wide ribbon can easily overwhelm a more compact tree, so scale is key.
- Adding subtle accents: Weave a thin ribbon through the branches as a secondary element to complement your main theme.
Choosing the right ribbon can feel a bit overwhelming with so many options. To make it easier, here’s a quick comparison of the most common types you’ll find.
Christmas Ribbon Type Comparison
| Ribbon Type | Best For | Ease of Shaping | Aesthetic Feel |
|---|---|---|---|
| Wired Ribbon | Creating structured bows, loops, and cascades that hold their shape. | Very Easy | Versatile (from elegant to rustic) |
| Velvet | A rich, luxurious, and traditional look. Deep, classic colour schemes. | Moderate (wired velvet is easier) | Plush, warm, and opulent |
| Satin/Organza | Adding a touch of glamour and light-reflection. Delicate, airy styles. | Difficult (unless wired) | Sheer, shimmering, and elegant |
| Burlap/Jute | Rustic, farmhouse, or natural-themed trees. | Easy (often wired) | Textured, earthy, and casual |
This table should give you a good starting point for matching a ribbon's properties to the look you're hoping to achieve this Christmas.
Calculating How Much Ribbon You Need
One of the most common decorating mistakes is running out of ribbon halfway through the job. A simple rule of thumb can save you from a last-minute dash to the shops. As a general guide, you'll need about 3 metres of ribbon for every vertical foot of your tree.
For example, a standard 7-foot tree would require about 21 metres (or roughly 70 feet) of ribbon for good coverage. It's always a good idea to buy a little extra, just in case!
This chart shows our recommended number of ribbon strands you’ll need for different tree heights, assuming each strand is cut to run the full length of the tree.
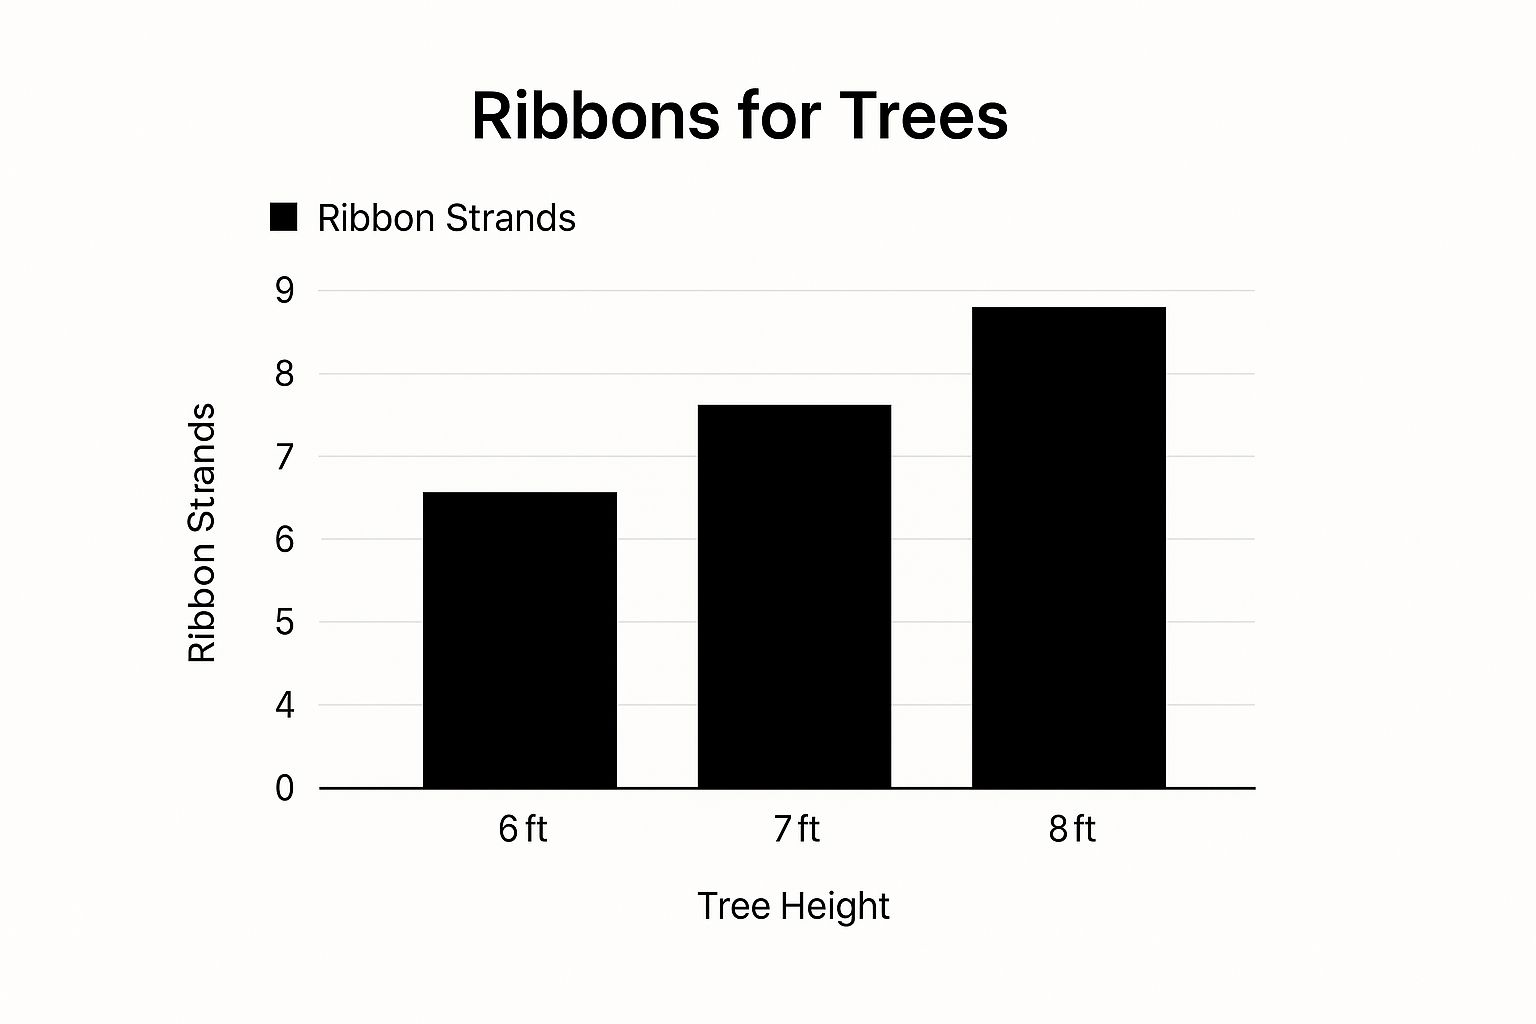
As you can see, the number of vertical strands you need goes up with the tree's height to make sure you get a full, balanced look. A little bit of planning here ensures you have all the material you need to bring your vision to life without any interruptions.
Once you’ve settled on the material, width, and quantity, you're all set. If you're looking for some inspiration, you can explore a wide variety of festive Christmas ribbons to find the perfect match for your theme.
Mastering Tree Ribbon Techniques
This is where the real fun begins. Let's move beyond rigid rules and complicated steps, because decorating your tree with ribbon should be creative and enjoyable, not a chore. We're going to walk through three popular and absolutely stunning techniques that deliver professional-looking results every single time.
Each method gives your tree a distinct personality, so you can pick the one that perfectly matches your vision.
The secret to all these methods is starting with the right material. For maximum control and beautiful, lasting shapes, a quality wired ribbon is non-negotiable. If you're on the hunt for options with fantastic structure, exploring a collection of wired-edged Christmas ribbons is a great place to start. That hidden wire is what lets you craft loops and cascades that won’t go limp halfway through December.
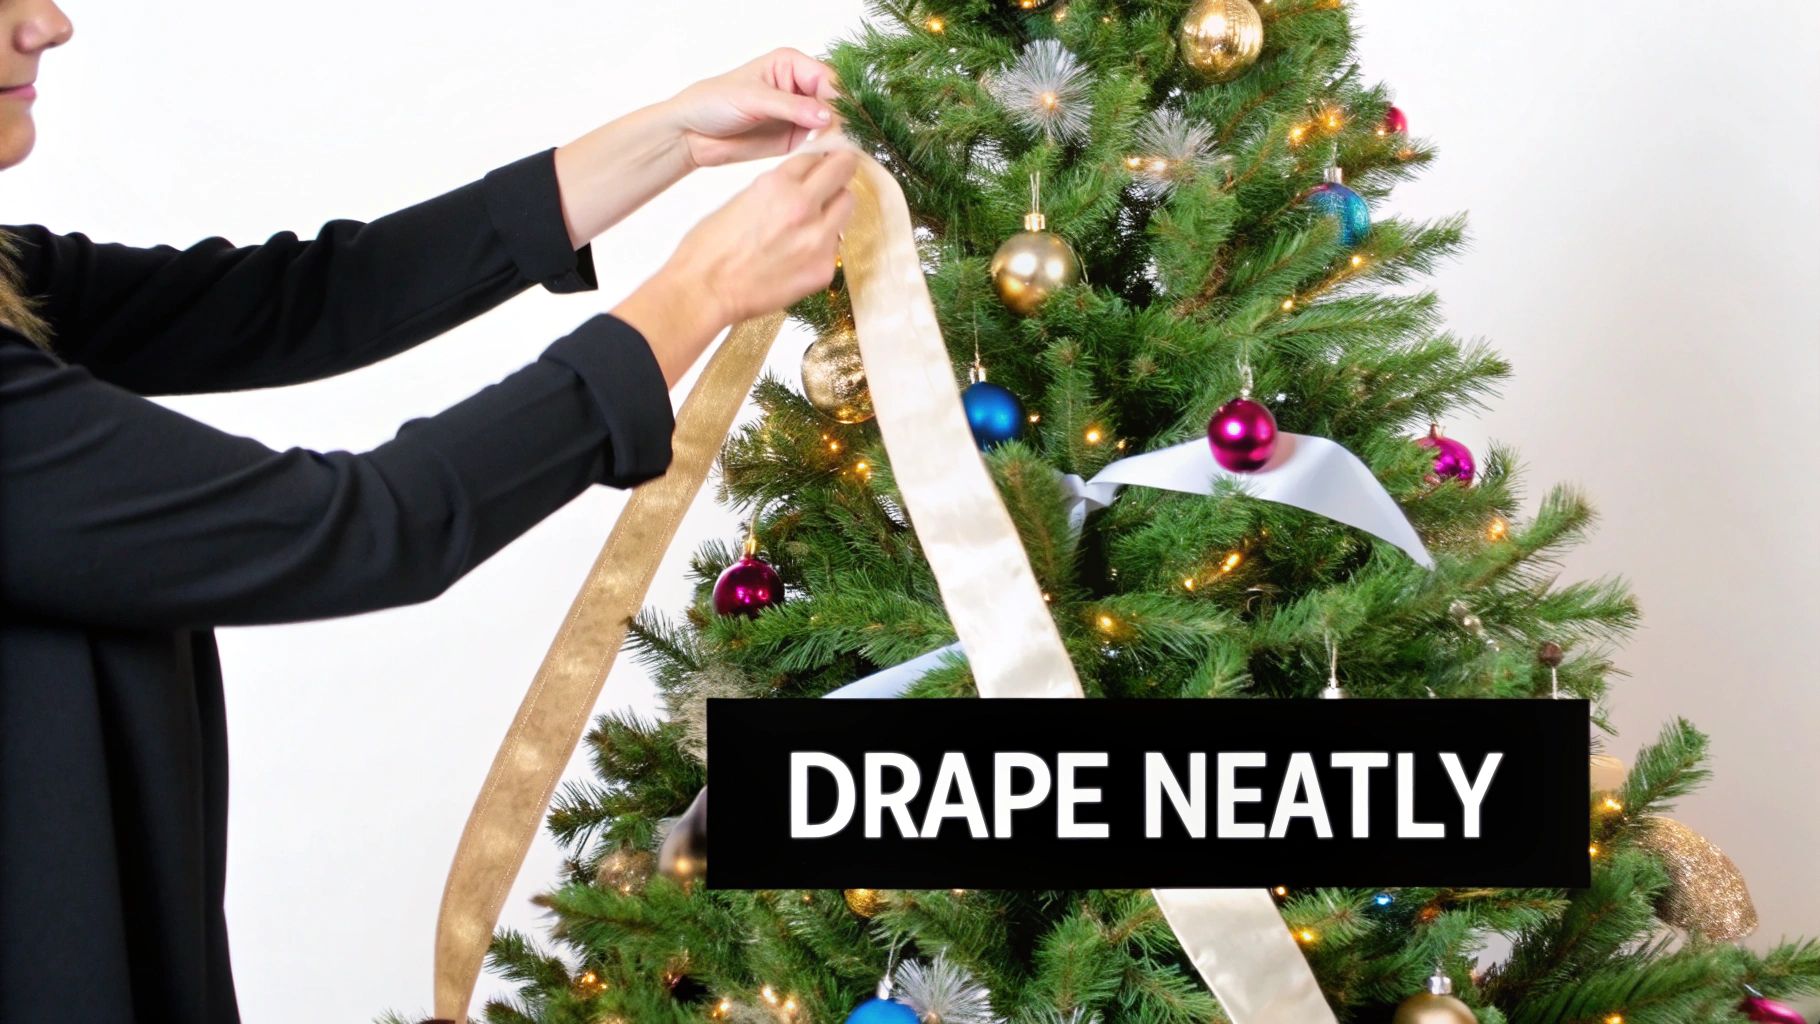
The Elegant Vertical Cascade
For a dramatic, sophisticated look that draws the eye down the tree, the vertical cascade is a fantastic choice. This technique creates elegant "waterfalls" of ribbon that flow right from the top to the bottom, and it's especially effective if you want to make your tree appear taller and more slender.
To get this look, cut your ribbon into strips roughly the height of your tree, but leave a bit extra for creating that lovely billowing effect. Start at the top, just beneath your tree topper, and secure the end of your first ribbon strip deep within the branches. A simple twist of a branch sprig around the ribbon is usually all it takes to hold it firmly in place.
Now, let the ribbon flow downwards, tucking it into the tree every 30-40 cm or so. As you tuck it in, create a soft "poof" or billow before securing it again with another branch sprig. This in-and-out motion gives the ribbon a natural, voluminous feel rather than just looking like a flat stripe. Continue this pattern all the way to the bottom, then snip the end at an angle and hide it amongst the lower branches.
A common mistake is simply laying the ribbon on top of the branches. Always secure it deep inside the tree. This makes it look like the ribbon is an integral part of the tree's structure, not just an afterthought.
The Cosy Horizontal Wrap
If you're aiming for a more traditional, cosy, and unified look, the horizontal wrap is a classic for a reason. This method involves spiralling the ribbon around the tree, much like you would with a garland, creating a lovely sense of movement and cohesion. It’s perfect for capturing that timeless, homespun Christmas feeling.
Begin at the top of the tree, securing your ribbon near the trunk. From there, gently work your way around and down the tree in a diagonal spiral. Instead of pulling the ribbon taut, let it drape softly over the outer edges of the branches for a more relaxed feel.
As you circle the tree, use that same tuck-and-billow technique we talked about earlier. Every few feet, tuck the ribbon slightly into the tree and secure it with a branch tip before letting it puff out again. This stops it from looking too stiff and adds wonderful depth.
- Tip for Fullness: Don't be afraid to let the ribbon weave in and out of the branches. This creates a more dynamic and less "perfectly wrapped" look.
- Spacing is Key: Try to keep the distance between each spiral relatively consistent to maintain a balanced look all the way down.
The Playful Billowing Tufts
For a style that’s textured, whimsical, and a bit more modern, the billowing tufts method is unbeatable. Instead of creating long, flowing lines, this technique is all about placing individual clusters or "tufts" of ribbon throughout the tree to fill gaps and add pops of colour and texture.
This approach is also a brilliant way to use up any leftover ribbon pieces you might have. Cut your ribbon into shorter lengths, typically between 30 cm and 60 cm. Take a piece and pinch it right in the centre, which will create a simple two-loop bow shape with two tails.
Find a space between the branches and tuck this pinched centre deep into the tree, securing it with a branch sprig. Once it’s firmly in place, you can fluff out the loops and arrange the tails to create a soft, full-looking tuft. Scatter these little clusters all over the tree, focusing on any sparse areas. It's a fantastic way to add volume and a touch of playful elegance to your design.
How to Layer Ribbons and Ornaments
Creating a truly show-stopping Christmas tree is all about the art of layering. It’s not just about hanging things on branches; it’s about building depth and character piece by piece. Getting the order right is absolutely crucial to make sure no single element gets lost in the shuffle.
Once your lights are twinkling away, your first and most important layer is the ribbon. Think of the ribbon as the visual roadmap for the entire tree. By getting it in place first, you define the flow and colour story before a single bauble is hung. This makes the ribbon look like an integral part of the design, beautifully woven in rather than just slapped on top.
With your ribbon perfectly draped, it's time to bring in the ornaments. I always start with the largest and most impactful pieces. These "statement" baubles should be nestled deep within the branches, which is a great trick for creating a sense of fullness and anchoring your whole design. Spacing them out evenly gives the tree a nice, balanced feel right from the start.
Creating Cohesion and Contrast
After your big ornaments are settled, you can start filling in the gaps with your medium and smaller decorations. This is where you can really have fun playing with different textures and finishes. For instance, if you've gone with a wide, plush velvet ribbon, pairing it with some shimmering metallic baubles creates a gorgeous, eye-catching contrast.
This methodical layering isn't just for looks; it's practical, too. Ribbon is a fantastic tool for filling any sparse areas in an artificial tree, giving it a much fuller, more luxurious appearance. It's a technique that's becoming more and more popular. While most of us decorate with traditional baubles, a surprising 63% of people admit to getting the number of ornaments wrong. Ribbons offer a stylish and budget-friendly way to fill those visual gaps and add lovely texture. If you discover more insights into UK Christmas decorating habits, you'll see why ribbon is fast becoming a key player in festive design.
Layering isn’t about cramming as much as possible onto the tree; it's about weaving a rich visual tapestry. The aim is to have something interesting to look at from every angle—whether it's the deep sheen of a velvet ribbon, the sparkle of a glass ornament, or the soft glow of fairy lights.
Practical Layering Scenarios
To help you visualise how this all comes together, here are a couple of real-world examples showing how you can combine different elements for that polished, professional look.
-
Scenario One: The Glamorous Metallic Tree
- Primary Ribbon: Begin with a wide, sheer organza ribbon that has a gold wired edge. The vertical cascade method works wonders for this style.
- Secondary Ribbon: Weave in a thinner, glittering gold ribbon to dial up the sparkle and add another layer of texture.
- Ornaments: Start with large, mirrored gold baubles tucked deep inside. Then, add medium-sized matte white and smaller, champagne-coloured glass ornaments towards the tips of the branches.
-
Scenario Two: The Rustic Woodland Tree
- Primary Ribbon: Use a wide burlap or jute ribbon. Wrapping it horizontally around the tree gives it a cosy, garland-like feel.
- Secondary Ribbon: Alongside the burlap, add a thin, red-and-black tartan ribbon for a pop of traditional colour and pattern.
- Ornaments: Begin with large wooden stars and pinecone clusters nestled in. Follow up with smaller red berry picks and delicate glass icicles on the outer branches to complete the look.
By following this layered approach, you guarantee that every single element, from the main ribbon to the tiniest bauble, gets its moment to shine. The end result is a cohesive and breathtakingly beautiful Christmas tree.
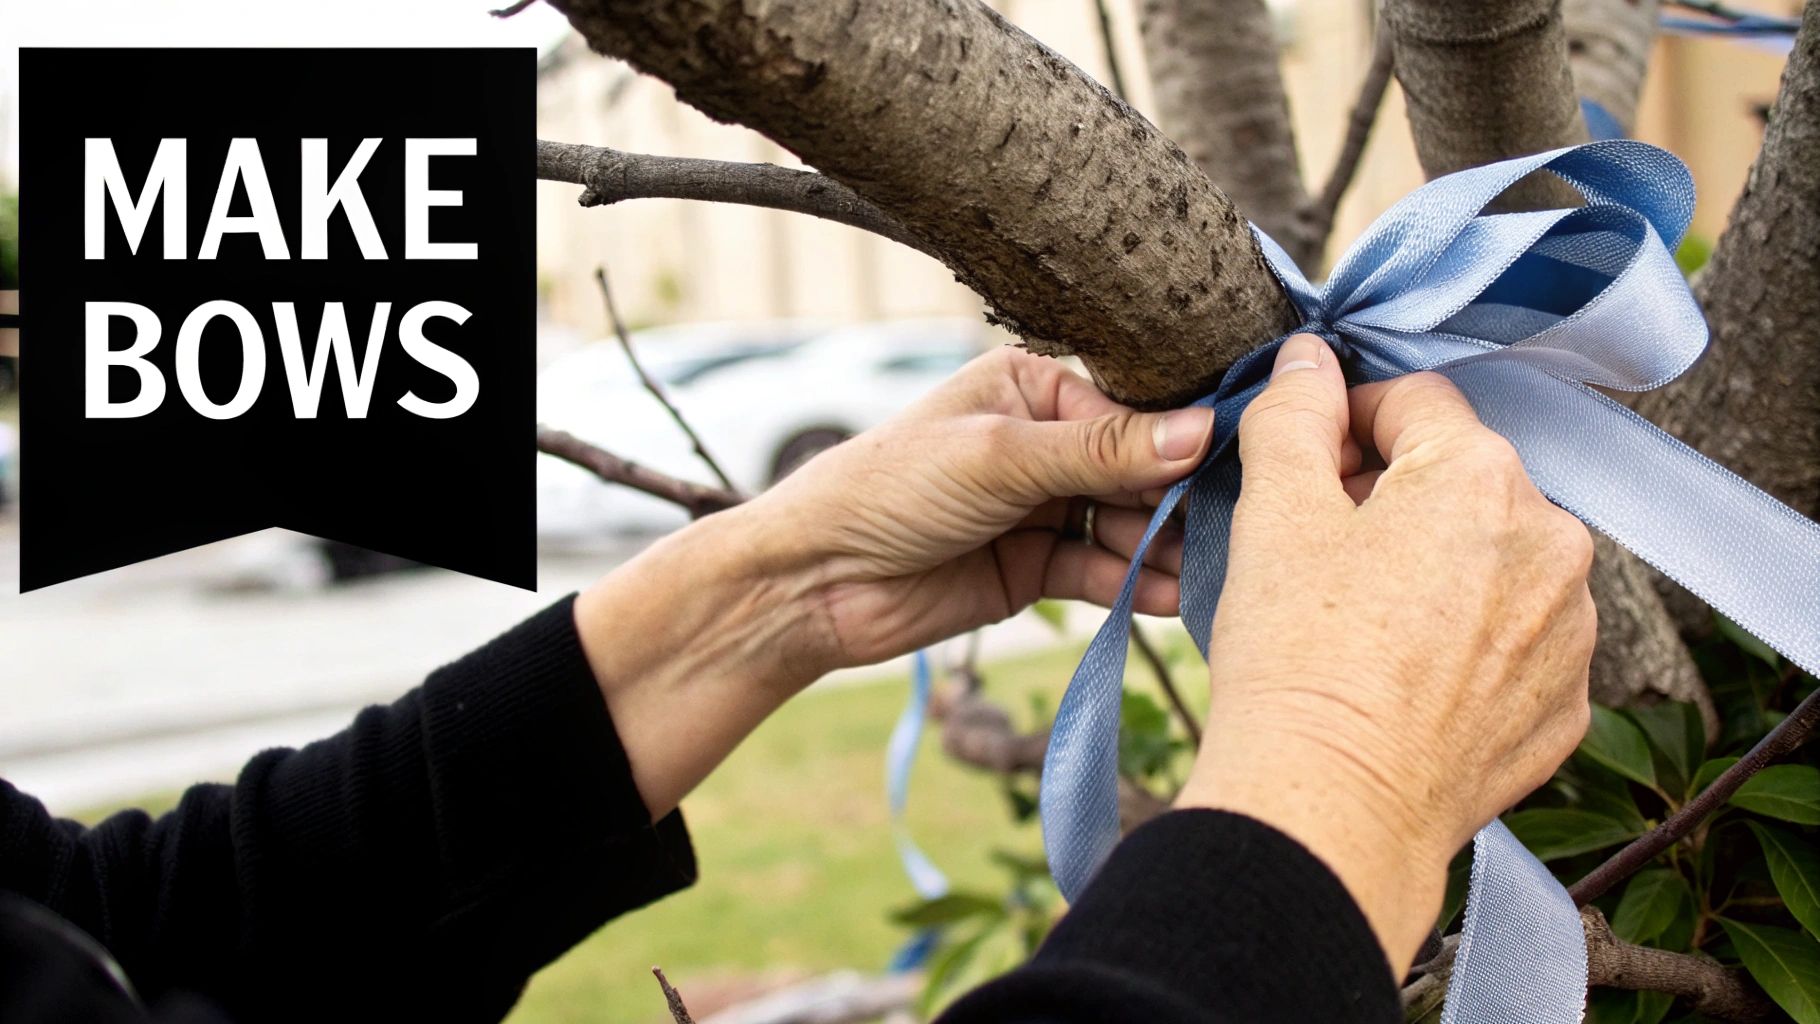
Creative Finishing Touches with Bows
With your main ribbons and ornaments perfectly placed, it's time for those final flourishes that take a tree from lovely to unforgettable. Bows are a brilliant way to add personality and polish, tying your whole design together.
A show-stopping, multi-looped bow can make a spectacular tree topper, offering a much more personal alternative to a traditional star or angel. The secret is to use a generous length of wired ribbon; it gives you the structure needed to create those full, beautiful loops that hold their shape.
Start by making a small centre loop, pinching and twisting the ribbon so the "pretty" side always faces out. From there, continue making progressively larger loops on either side of that centre point. After adding each pair, pinch and secure them tightly in the middle with a bit of floral wire.
Once you’ve built a bow with six to eight loops, you’ll have a stunning, professional-looking topper. You can leave the tails long to cascade elegantly down the sides of your tree, or trim them to your desired length.
Scattering Accent Bows
Beyond the topper, smaller, matching bows can add delightful pops of colour and texture throughout the rest of the tree. I love using these little accents on the very tips of branches to give the design a delicate, finished feel.
You can create simple two-loop bows or even single loops with tails to sprinkle around your tree. It's a fantastic way to:
- Fill in any remaining small gaps that still look a bit bare.
- Reinforce your colour scheme in a subtle, balanced way.
- Add a touch of whimsy and visual interest to the outer edges.
These smaller bows don’t need to be as elaborate as your topper—their job is to complement, not compete. If you're looking for different styles or just want to save a bit of time, you can find a wonderful selection of beautifully handmade Christmas bows ready to go.
Don’t throw away your leftover ribbon! Even small offcuts have incredible decorating potential. Using these scraps ensures your entire holiday décor feels cohesive and thoughtfully planned, extending your theme beyond just the tree itself.
Unifying Your Holiday Décor
Those extra ribbon pieces are perfect for connecting your tree's theme to the rest of the room. A simple trick is to wrap the base of your tree stand with a wide ribbon for a polished finish.
You can also tie matching bows onto nearby wreaths, garlands, and even curtain tie-backs. This simple step creates a harmonious flow, making your entire space feel festive and professionally coordinated.
Got a Question About Your Tree Ribbon?
Even with the best tutorials, it's completely normal to have a few questions pop up when you're in the middle of decorating. Getting your ribbon to look just right is a creative process, and let's be honest, sometimes things don't go exactly as planned. We've been there!
Below, we’ve tackled some of the most common challenges and queries we hear from fellow decorators. Think of these as your friendly troubleshooting tips to keep the process joyful and stress-free, whether this is your first time using ribbon or you’re just after a few new tricks.
Common Ribbon Conundrums
That little moment of panic when you realise you're running out of ribbon halfway through the tree? Don't worry, it happens to the best of us, and it's an easy fix!
Simply start the new roll at the back of the tree, tucking the end deep into the branches where it won’t be seen. You can discreetly secure the new end to the old one with a tiny piece of floral wire. Once you place an ornament nearby, no one will ever spot the join.
Another question we get asked all the time is about which type of ribbon is genuinely best for the job.
- Wired Ribbon: For pretty much any technique—cascades, wraps, loops, and tufts—wired ribbon is always the superior choice. The wire hidden in the edges is your secret weapon; it’s what lets you create those beautiful, full-bodied shapes that hold their form all season long.
- Non-Wired Ribbon: This type is better suited for simpler tasks. It's lovely for tying simple bows on the tips of branches or for a very simple, straight vertical drape, but it just doesn't have the structure needed for more elaborate designs.
The key takeaway here is that wired ribbon gives you creative control. It transforms the ribbon from just another decoration into a versatile styling tool, allowing you to shape it precisely to fit your vision. It ensures your tree looks just as good on Christmas Day as it did the moment you finished decorating.
Storing Your Ribbon for Next Year
Proper storage is the secret to keeping your ribbons looking pristine for years to come. Rushing this step at the end of the season can lead to frustrating creases and damage that are a nightmare to fix next December.
To avoid this, always take a moment to gently roll your ribbon back onto its original spool or even a sturdy piece of cardboard. For any larger, pre-made bows, the trick is to stuff them with a bit of tissue paper. This little step helps them maintain their full shape. Store them all in a solid box where they won't get squashed by other decorations, ensuring they’re ready to go for next year's tree.
At Ribbons4u Ltd, we believe the perfect ribbon can completely transform your festive decor. From luxurious velvets to versatile wired options, we have everything you need to bring your Christmas vision to life. Explore our extensive collection of high-quality ribbons today at ribbonsforyou.com.


 Facebook
 Twitter
 Pinterest