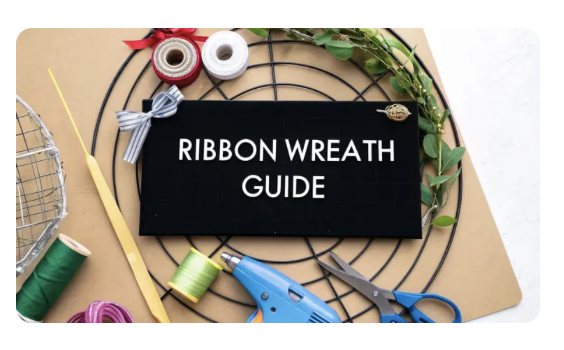
How to Make Ribbon Wreaths: Easy Step-by-Step Guide
Before you even think about tying your first ribbon, the real magic of wreath making begins with gathering your supplies.It’s a bit like cooking; the quality of your ingredients directly impacts the final dish. Choosing the right frame, the best ribbons, and a few essential tools is what separates a homemade-looking wreath from one that looks like it belongs in a fancy boutique. This is the secret to creating something truly stunning that will last for many seasons.
Choosing Your Wreath Making Materials
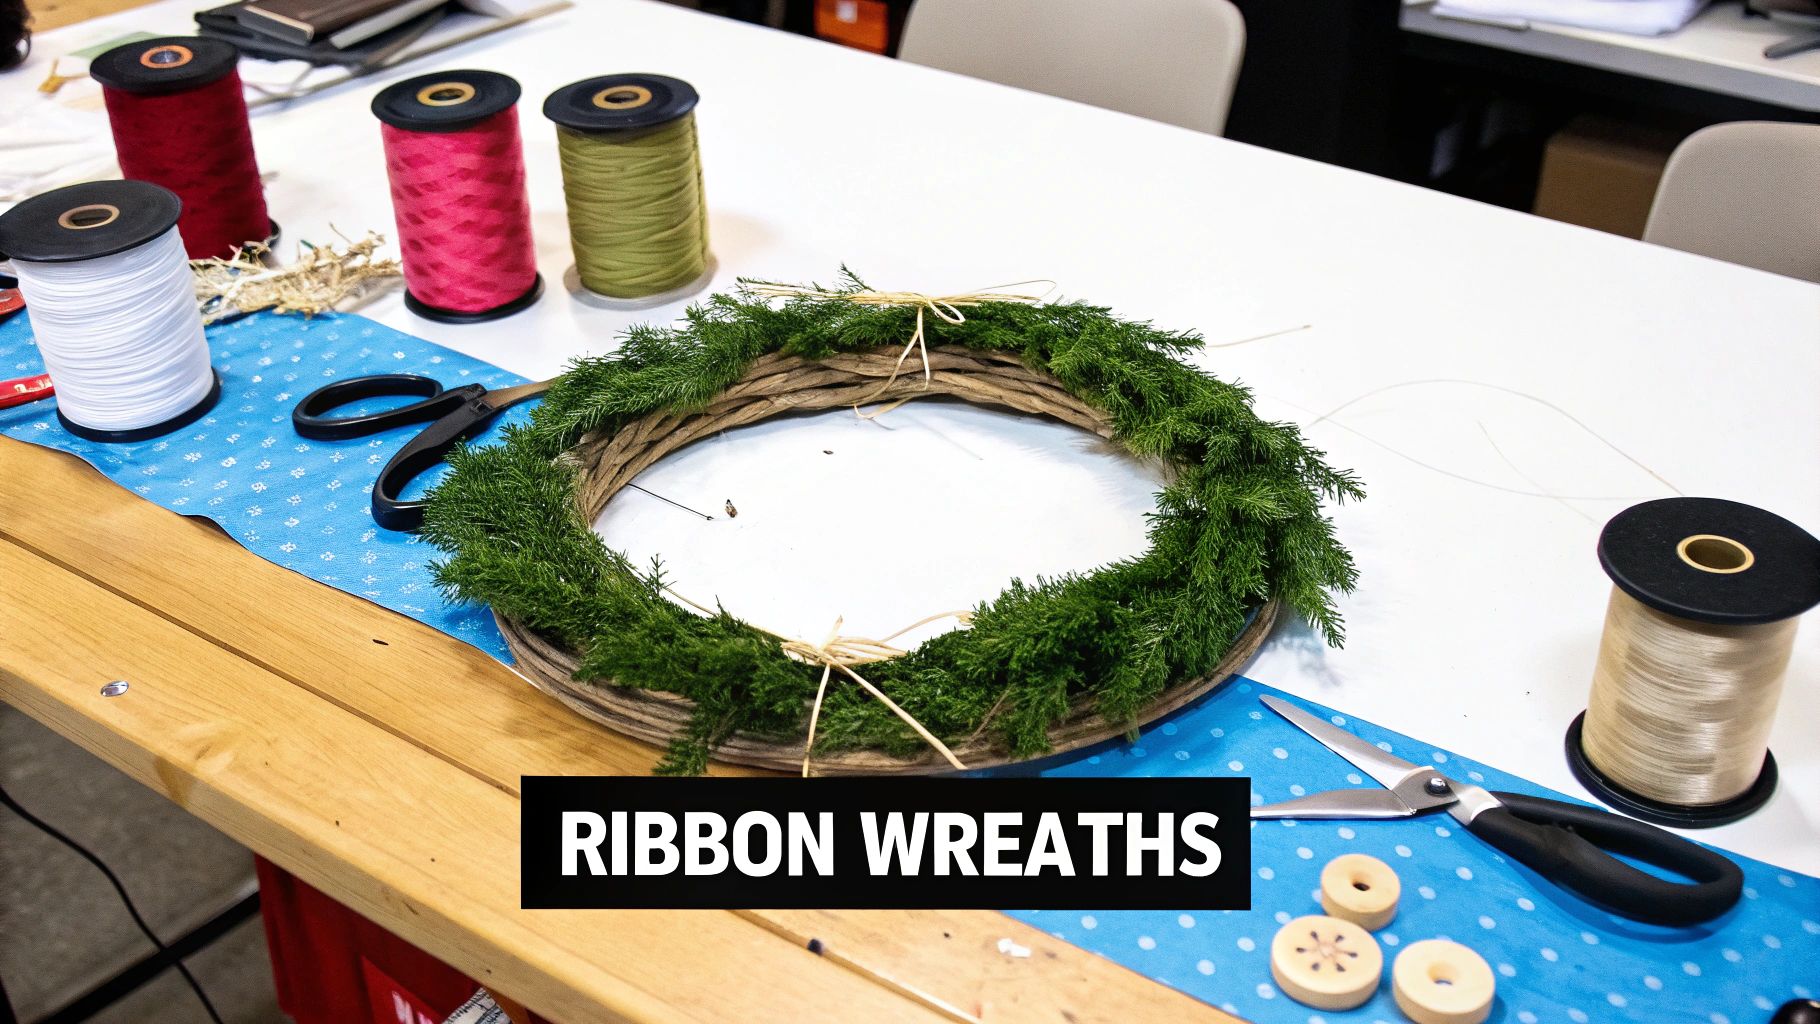
Putting a little thought into your supplies really sets the stage for a great crafting session. When you have good-quality components to work with, the whole process is more enjoyable, and you’ll be able to build a gorgeous, full-bodied wreath you can be proud of.
To help you get started, here's a quick checklist of everything you'll need.
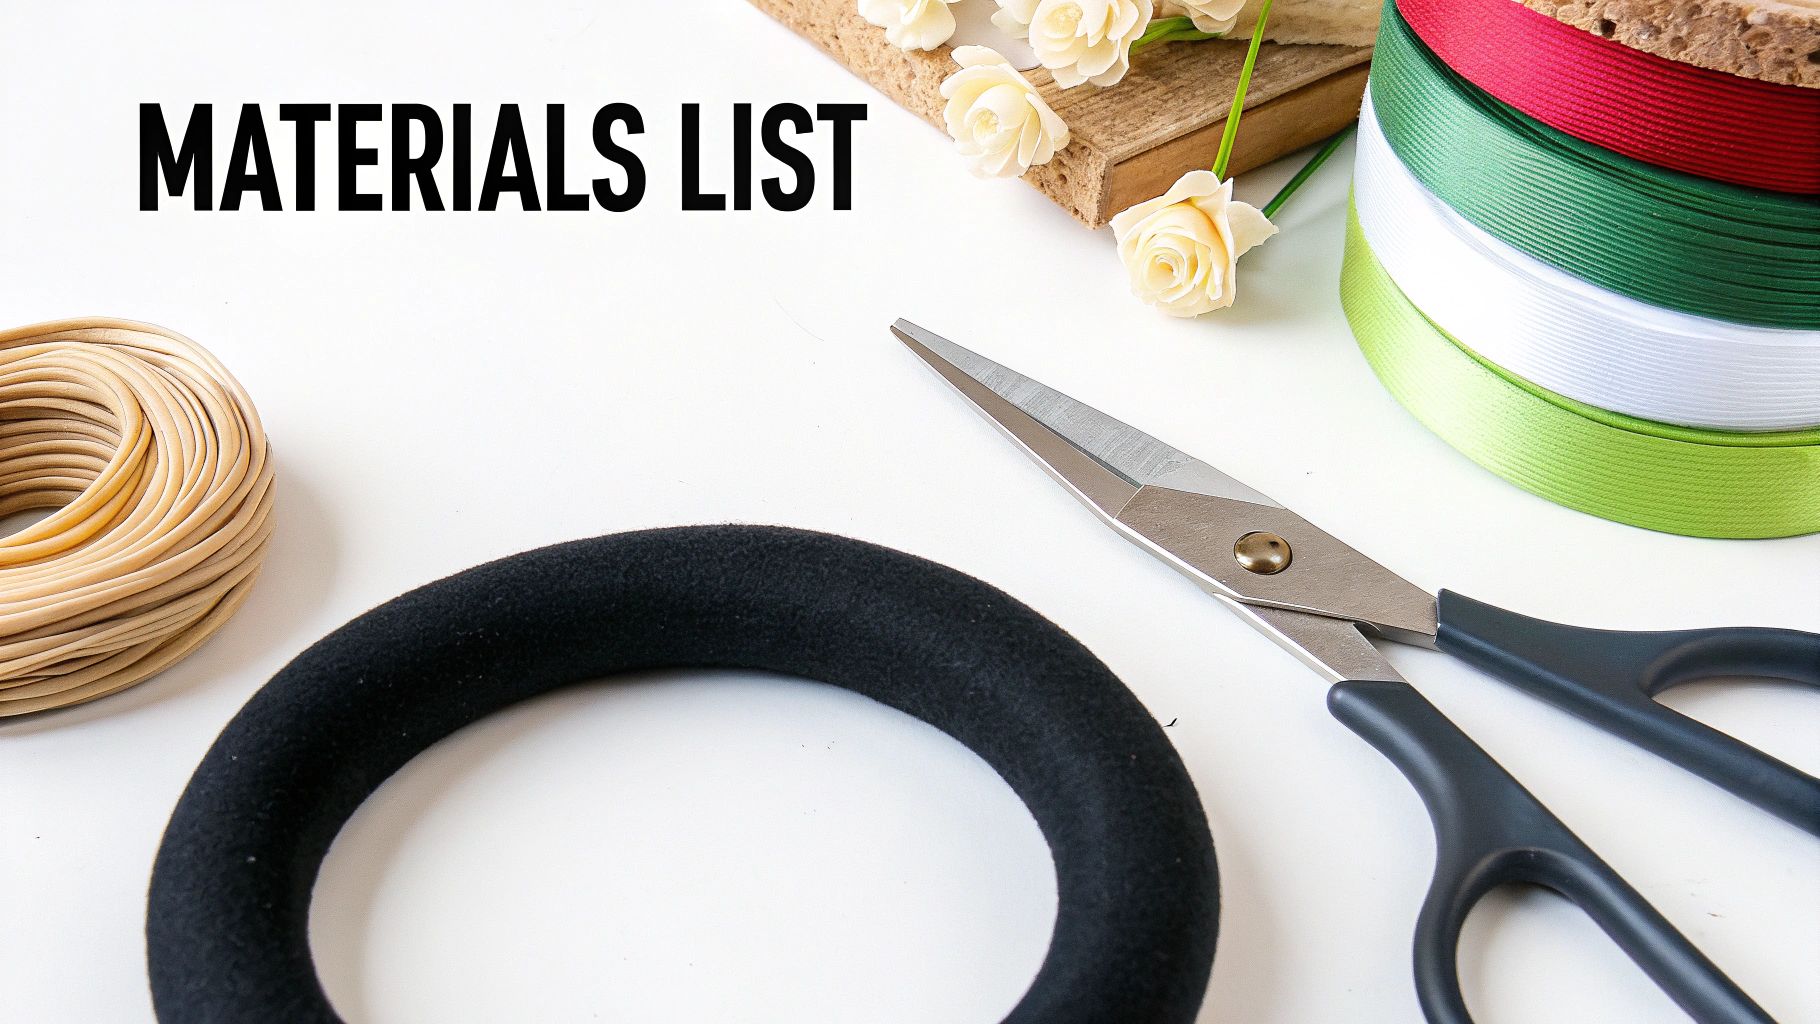
Essential Ribbon Wreath Material Checklist
| Item | Recommended Type | Why It's Important |
|---|---|---|
| Wreath Frame | 14-inch wire frame | The multiple rings and crossbars give you plenty of anchor points for attaching ribbons securely and creating a full look. |
| Ribbon | Wired ribbon | The wire in the edges is non-negotiable! It’s what allows you to shape beautiful, voluminous loops that hold their form. |
| Scissors | Sharp fabric scissors | A dedicated pair ensures clean, crisp cuts without fraying your ribbon, which is key for a professional finish. |
| Hot Glue Gun | Standard craft glue gun | Perfect for adding those final embellishments like baubles, faux flowers, or pinecones securely. |
| Pipe Cleaners | Standard craft pipe cleaners | Incredibly useful for attaching ribbons to the frame. They are much easier to twist and secure than floral wire. |
With these items on hand, you’re well on your way to creating a beautiful wreath. Let's take a closer look at a few of these key components.
The Wreath Frame Foundation
The frame is the skeleton of your wreath, so it needs to be solid. While you might see foam or grapevine options in craft shops, for this kind of project, a wire wreath frame is hands-down the best choice. These usually have four concentric wire rings connected by crossbars, and that structure is exactly what you need.
Those gaps between the wires are the perfect place to tie or twist your ribbons on. This gives you fantastic control over where everything goes and helps you build up that lovely, full appearance. A standard 14-inch frame is a brilliant starting point; it’s a great size for most front doors and isn't too overwhelming to fill if you're a beginner.
Selecting the Perfect Ribbons
Here’s the fun part—the ribbons! They are the absolute star of the show, and your choice of colour, pattern, and texture will define the entire personality of your wreath.
If you take only one piece of advice, let it be this: always opt for wired ribbon. Honestly, it’s a game-changer. That fine wire running along the edges is what gives you the power to shape your loops and bows, creating that wonderful volume and making sure your design doesn’t go limp and floppy after a week on the door. You can find a huge variety of wired ribbons perfect for wreath making online to get some ideas.
For a really rich and professional look, I love to mix and match different textures.
- Grosgrain: Its lovely ribbed texture adds a classic, almost rustic feel.
- Satin: This gives you a smooth, elegant sheen that’s perfect for more formal or festive designs.
- Velvet: Nothing says luxury quite like velvet. It adds a wonderful depth and is my go-to for autumn and winter wreaths.
The DIY home decor trend has really taken off here in the UK, and decorative wreaths are a firm favourite. Thankfully, this means it's easier than ever to find a great selection of wreath-making supplies.
Essential Tools of the Trade
You don’t need a fancy workshop to make a gorgeous wreath, just a few trusty tools to make the job cleaner and more straightforward.
Crafter's Tip: My best advice is to invest in a decent pair of fabric scissors and hide them from the rest of the family! Keep them just for cutting ribbon. If they’re used on paper or cardboard, the blades will dull in no time, and you’ll end up with frayed, messy cuts. A sharp, clean snip makes all the difference.
Beyond your scissors, a reliable hot glue gun is a must-have for securing any extra embellishments at the end. I also like to have a stash of pipe cleaners on hand; they're brilliant for attaching heavier decorations or for fashioning a secure hanging loop on the back of the frame.
Getting Your Ribbons Ready
 Honestly, a little bit of prep work now saves a massive headache later. Taking the time to get your ribbons and wreath frame organised before you even think about attaching anything is my secret weapon for a stress-free crafting session. It turns what could be a chaotic mess into a smooth, enjoyable process where everything is ready to go.
First, let's look at the wreath frame itself. If you're using a standard wire frame, the prep is minimal. Just lay it down and take a look at its structure. You'll notice it's divided into sections by the metal crossbars – these are your guides. Mentally mapping these out now will help you distribute your ribbons evenly later, so you don't end up with bald patches.
Measuring and Cutting the Ribbon
This is probably the most time-consuming part of the whole project, but it’s absolutely key to getting that lush, professional look. The length you cut your ribbon strips to really dictates the final style of your wreath.
For a classic, loopy wreath on a typical 14-inch frame, I find that cutting your ribbons into 8 to 10-inch lengths is the sweet spot. This gives you enough ribbon to form a lovely, puffy loop with some tail left over to add to the overall fullness. On a frame this size, you'll generally need about 18 strips of each colour or pattern you've decided to use.
Here are a couple of my favourite time-saving tricks for the cutting stage:
- Cut in Batches: Don't measure and snip every single piece one by one! Measure your first strip carefully, then use it as a guide to cut several layers of ribbon at once. It speeds things up immensely.
- Invest in a Rotary Cutter: If you think you might get bitten by the wreath-making bug, a rotary cutter and a self-healing mat are a game-changer. They deliver clean, precise cuts in a fraction of the time.
My Two Cents: Don't get too hung up on making every single piece identical. A slight variation in length here and there actually adds to the charm and texture of a handmade wreath. Once it’s all put together, you’ll never notice the tiny differences.
Adding That Professional Finish
With all your ribbons cut to size, there’s one last detail that takes your wreath from looking simply "homemade" to truly "hand-crafted." Finishing the ends prevents them from fraying, especially if you're using non-wired ribbons, and it just looks so much neater.
The go-to method is the classic dovetail cut, also known as a V-shape. It’s easy to do: just fold the end of a ribbon strip in half along its length. Then, cut from the folded edge up towards the outer edges at about a 45-degree angle. When you open it up, you’ve got a perfect little notch.
By getting all this prep out of the way first, you can really get into the creative zone when it's time to assemble. Your workspace is tidy, your materials are ready, and now the real fun begins.
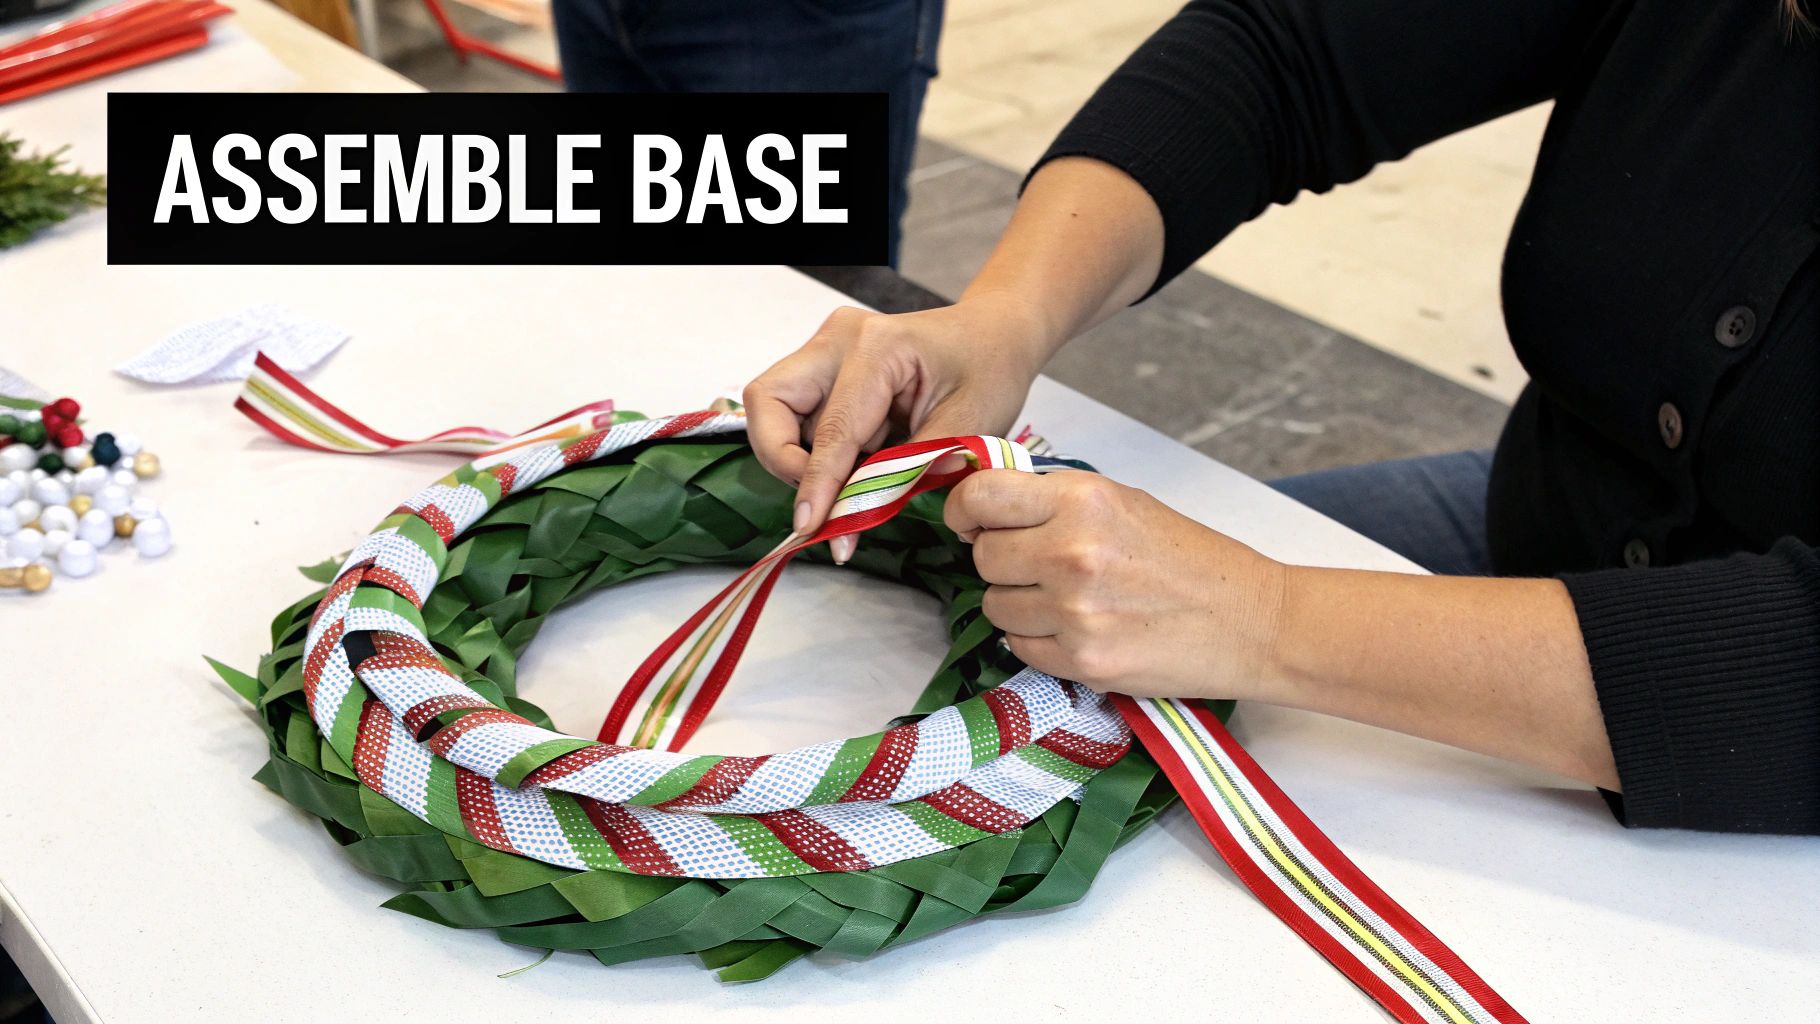
Right, this is where the magic really happens. You've got your supplies sorted, and now it's time to turn that bare frame into a stunning wreath. This is the moment your project truly comes to life.
The way you attach your ribbons is what gives your wreath its personality. Are you going for something big, fluffy, and full of festive cheer, or something a bit more sleek and understated? Let's walk through two of the most popular techniques I've seen used by crafters across the UK. Each one gives a different finish, but both will help you create a beautiful, professional-looking wreath you can be proud of.

Above: Loop style ribbon wreath being made
The Classic Loop and Twist Method
This is my go-to technique, and for good reason. It’s how you get that wonderfully lush, dense look that you often see in high-end shop displays. I find it’s especially good when you’re mixing several different colours and patterns, as it lets each ribbon stand out. The real secret is the 'twist'—it locks the ribbon in place and helps the loops stand up perfectly.
Here’s a breakdown of how I approach it:
- Get started: Grab one of your pre-cut 8 to 10-inch ribbon strips. Pinch it right in the middle to form a little pleat or bow-tie shape.
- Attach it to the frame: Place that pinched centre against one of the inner wires on your wreath frame. Take a pipe cleaner, wrap it tightly around the ribbon, and then twist it securely onto the wire. Give it a good, firm twist so it doesn't wobble.
- Find your rhythm: Work your way around the frame, section by section. A method I really like is to attach one ribbon bundle (a mix of all my chosen patterns) to each crossbar first. After that, I go back and fill in the gaps between the crossbars, focusing on the two inner rings of the frame.
- Fluff as you go: This is crucial! As you add more ribbons, don’t forget to fluff them out. Separate the tails and position the loops to start building that lovely volume. Doing this as you work prevents everything from getting squashed and flattened by the time you're finished.
This method has a rich history in British home crafting. The hobby really took off in the 1980s, and ribbon wreaths became a common sight in home crafting kits. By the mid-1990s, wire frames and hot glue guns were standard issue in workshops, which really helped improve both the structure and the creative possibilities of these designs. You can read more about the history from the UK-based experts at Belfor.com.
The Voluminous Pouf Technique
If you're starting with a base of very wide ribbon or deco mesh, the pouf method is a brilliant way to build up volume fast. Instead of using lots of little pre-cut strips, you work directly from the spool of ribbon. This creates these big, billowy 'poufs' that form the foundation of your wreath.
Crafter’s Insight: The real trick to a great-looking pouf wreath is consistency. You want each pouf to be roughly the same size. When I first started, I'd use a ruler for the first few until I got a feel for the right length, which for me is usually about 10-12 inches.
To begin, secure the end of your ribbon to the frame with a pipe cleaner. Measure out your pouf length, then scrunch the ribbon together and attach it to the next section of the frame. You just keep repeating this all the way around, creating a full circle of lovely, voluminous poufs. Once that base is done, you can layer other, narrower ribbons on top using the loop and twist method we just covered.
This simple infographic quickly shows how the initial ribbon selection sets you up for success, no matter which attachment method you choose.
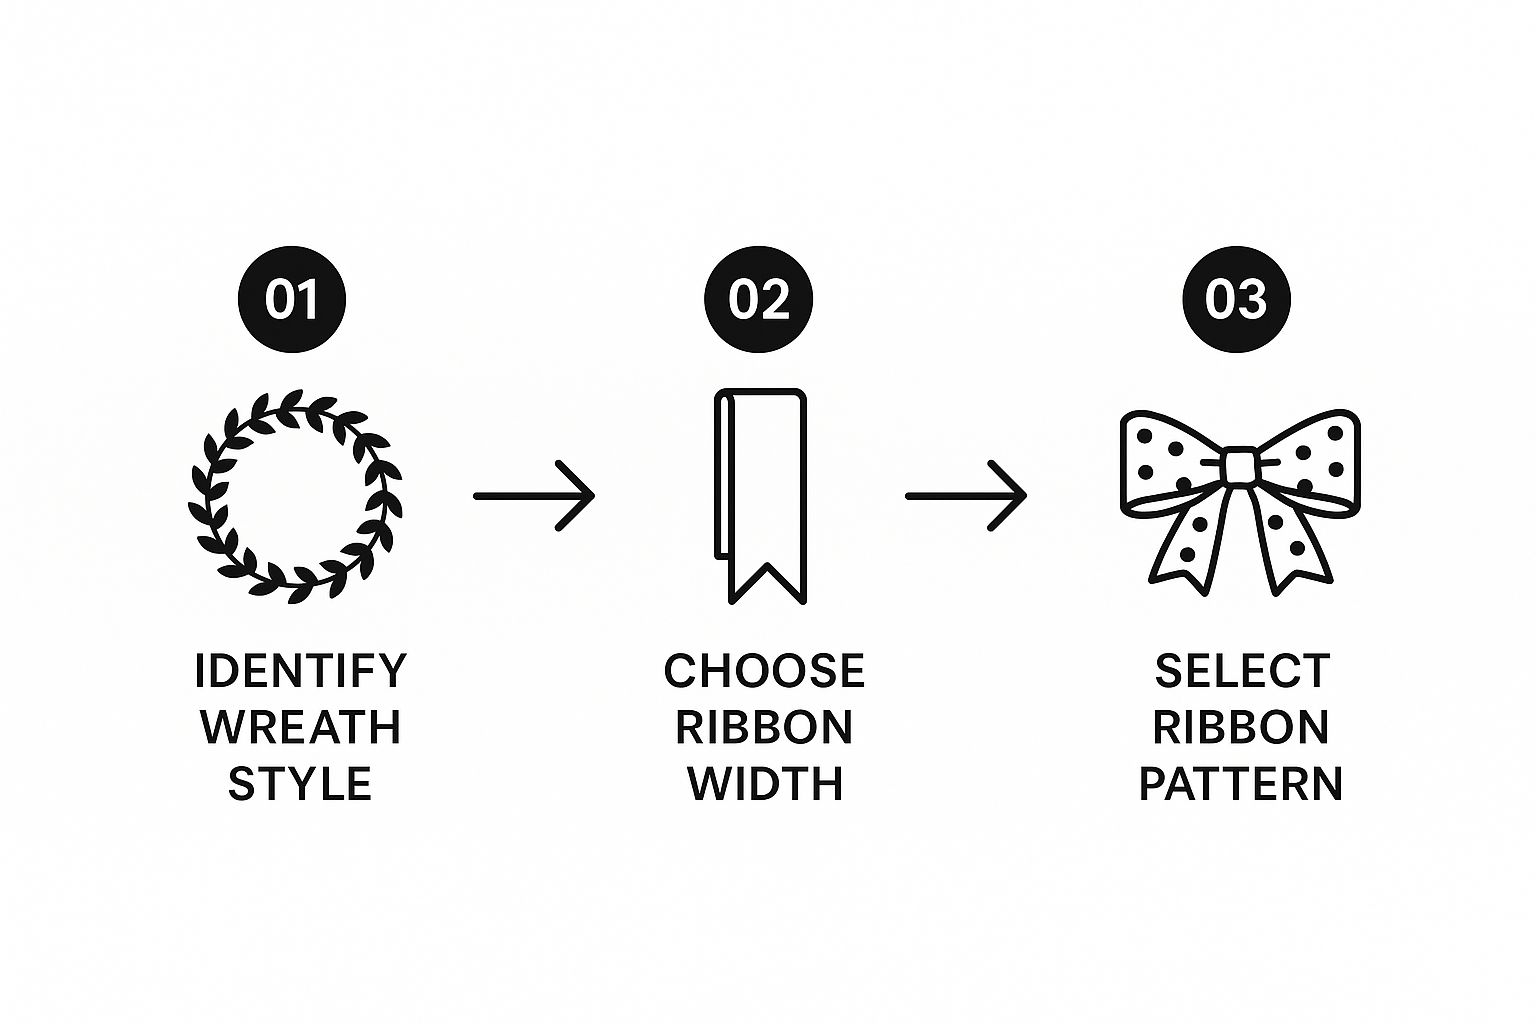
As you can see, thinking about your ribbon choices in relation to your final design goal makes the whole process smoother and leads to a much more cohesive final piece.
Bringing Your Wreath to Life with Embellishments and Finishing Touches
Right now, you should have a beautifully full ribbon wreath in front of you. It probably looks great as is, but this next stage is my favourite part. It’s where we add those little details that take a project from simply ‘handmade’ to truly stunning home décor.
Think of it as adding the final layer of personality. For a Christmas wreath, this might mean tucking in some mini baubles or faux frosted berries between the ribbon loops. If you're creating an autumn design, a few small pinecones or dried orange slices can add a lovely rustic feel, while a spring wreath always looks gorgeous with a few sprigs of faux blossom woven through.
How to Secure Your Decorations
The trick is to make sure everything is firmly attached without crushing the lovely ribbon loops you’ve just created. For this, your two best friends will be floral wire and a trusty hot glue gun.
- For Lighter Items: I find a small dab of hot glue is perfect for little things like faux berry clusters or single silk flower heads. Just pop the glue straight onto the embellishment and press it firmly onto a ribbon or, even better, directly onto the wire frame beneath.
- For Heavier Items: Anything with a bit of weight to it—like a bunch of pinecones or a small wooden sign—needs something stronger. Floral wire is the answer. Just thread it around the item, poke the ends through the ribbons, and twist it tightly around the wire frame at the back.
A Little Tip From Experience: When you’re using hot glue, try to nestle your decorations deep within the ribbon clusters. This does two things: it hides any globs of glue and makes it look as though the decorations are growing naturally out of the wreath.
Why not get a bit more creative? Exploring different craft accessories can spark some brilliant ideas. I’ve seen people use tiny craft beads, buckles, and other accessories to add a touch of glamour to a New Year's or anniversary wreath.
Crafting a Show-Stopping Bow
Let’s be honest, almost every amazing ribbon wreath you see has a big, gorgeous bow as its centrepiece. It’s not just an add-on; it’s a vital part of the design that provides a focal point and gives it that professional, polished finish.
Making a full, multi-layered bow is much easier than it seems. The secret is to use wired ribbon, which holds its shape beautifully. Start by making a small loop and pinching the ribbon at its base. Make another loop on the opposite side, then another on the first side, and so on. I usually aim for two to three loops on each side, making them slightly bigger as I go. Once you're happy, cinch the centre tightly with a pipe cleaner, leaving the long ends free so you can attach it to your wreath frame.
The Final Fluff and Hanger
We’re on the home stretch! The very last step is what I call the "fluff and fill". Hang your wreath up or prop it against a wall and take a few steps back. Look at it properly. See any gaps? Any spots where the ribbon looks a bit flat? Now’s the time to dive back in, tweak the ribbon loops, adjust the tails, and shift your embellishments until it looks perfectly balanced from every angle.
Finally, you need a way to hang it. Just take a pipe cleaner or a sturdy piece of floral wire, form it into a loop, and twist it securely around the top wire ring on the back of your wreath. That’s it—your masterpiece is finished and ready for its grand debut on your door
Seasonal Wreath Inspiration For Year-Round Crafting
Once you've got the hang of making a ribbon wreath, you'll soon realise the fun doesn't have to stop when Christmas is over. Why pack away your skills for eleven months of the year? By simply changing up your ribbons and adding a few seasonal touches, you can create a gorgeous, handmade welcome for your door, whatever the season.
This is what I love most about ribbon wreaths—their incredible versatility. You can move beyond the big holidays and celebrate the smaller moments, the turning of the seasons, all with a bit of personal flair. A well-made wreath can become a key part of your home’s decor, changing as the months roll by.
Spring and Easter Delights
As soon as you see the first daffodils pop up, it’s a perfect excuse to give your front door a splash of that hopeful spring feeling. A wreath bursting with fresh, light colours is just the ticket.
- Colour Palette: Think soft pastels. I love mixing mint green, sunny lemon yellow, delicate lavender, and pale pink. Weaving in a crisp white or cream ribbon really lifts the whole design and keeps it feeling airy.
- Embellishments: This is where you can have some real fun. Try tucking in some faux pussy willow stems or tiny speckled eggs for a clear nod to Easter. Small silk blossoms, like cherry or apple blossom, also look beautiful nestled between the ribbon loops.
For a really lovely, sophisticated Easter wreath, I often combine a simple gingham ribbon with a more luxurious satin one in a matching pastel shade. That mix of rustic charm and elegance is a combination that just always works.
Autumnal Warmth and Halloween Fun
When the air turns crisp and the leaves start to fall, it’s time for your wreath’s colour palette to get a bit cosier. This season is all about rich, warm tones and comforting textures.
A truly successful autumn wreath should feel like a brisk walk in the woods. I always start with a base of burnt orange, deep burgundy, and mustard yellow ribbons. Then, for a little something extra, I’ll add a shimmering gold or copper ribbon to the mix—it catches the low autumn sunlight beautifully.
Come October, it's easy to give this autumnal base a spooky twist for Halloween. Just weave in a few black and purple ribbons. You can then add little details like tiny gourds, a few strands of faux spiderweb, or even a small wooden "Boo!" sign wired to the centre to instantly get it ready for trick-or-treaters.
To help you plan your designs throughout the year, here's a quick guide to pairing colours and textures for each season.
Seasonal Ribbon Colour Palette Inspiration
This table offers a starting point for selecting ribbon colours and textures that perfectly capture the spirit of each season, helping you create wreaths that feel current and beautifully designed.
| Season | Core Colour Palette | Texture & Embellishment Ideas |
|---|---|---|
| Spring | Pastel Pink, Mint Green, Lemon Yellow, Sky Blue, Cream | Satin, Organza, Gingham. Add small faux eggs or silk blossoms. |
| Summer | Bright Fuchsia, Turquoise, Sunshine Yellow, Lime Green | Grosgrain, Printed Cottons (florals, stripes). Add tiny seashells or bee charms. |
| Autumn | Burnt Orange, Mustard Yellow, Deep Burgundy, Chocolate Brown, Gold | Velvet, Hessian, Taffeta. Weave in mini pinecones or dried leaves. |
| Winter | Forest Green, Deep Red, Icy Blue, Silver, White | Wire-edged metallics, Velvet, Tartan. Add faux berries or sparkly snowflakes. |
Thinking in palettes like this makes it much easier to shop for supplies and ensures your final wreath looks cohesive and professionally finished.
Celebrating The Festive Season
Let’s be honest, Christmas is the spiritual home of wreath making. It’s when the craft truly comes alive. The demand for decorative wreaths in the UK sees a massive spike during the festive period, and ribbon wreaths are always a favourite for crafters. This trend is part of a growing global market, which you can read more about on DataIntelo.com, and it has certainly boosted the availability of fantastic craft supplies right here at home.
For that classic British Christmas look, you just can’t beat a combination of deep reds, forest greens, and a touch of glittering gold. Tartan ribbons are especially popular, giving a wonderfully traditional and cosy feel to any door. If you're looking for inspiration, browsing a curated range of festive Christmas ribbons is a fantastic way to get your creative ideas flowing.
Here are a few combinations I come back to year after year:
- Classic Elegance: Red velvet, gold satin, and a rich green grosgrain ribbon. Simple, but always stunning.
- Winter Wonderland: Icy blues, shimmering silvers, and crisp whites. Look for ribbons with a touch of glitter or a frosted edge.
- Modern Rustic: Pair a natural hessian ribbon with a deep navy blue and a clean white for a more contemporary, Scandinavian-inspired look.
By thinking seasonally, you can turn a single craft into a year-round creative outlet, making sure your home always has a beautiful, handmade welcome waiting.
Answering Your Ribbon Wreath Questions
As you get stuck into crafting, a few questions inevitably crop up. Don't worry, every wreath maker has been there! Getting these little details right is often what takes a wreath from good to truly fantastic.
Let's dive into some of the most common queries that come up when you're learning how to make a ribbon wreath. These practical tips should help you solve any little hiccups and really perfect your technique.
How Much Ribbon Do I Really Need?
This is always the number one question! The honest answer is: it depends entirely on the size of your wreath frame and how full and luscious you want the final look to be.
For a standard 14-inch wire frame—a really popular choice for front doors—a good rule of thumb is to have about 10-15 metres of ribbon for each colour or pattern you're using. This estimate works well for the common loop and twist method we've been talking about.
My Personal Tip: It is always better to buy a bit more ribbon than you think you'll need. Honestly, there's nothing more frustrating than running out of your favourite pattern halfway through a project! Any leftovers are perfect for making a matching bow or adding a flourish to another craft.
Having that extra metre or two gives you a great safety net. It also means you can add more loops if you spot a sparse-looking area as you're finishing up.
Why Are My Ribbon Loops So Floppy?
If your ribbon loops are drooping and just won't hold their shape, the culprit is almost certainly the ribbon itself. More often than not, it’s because the ribbon doesn't have wire in its edges.
For those perky, full loops that really define a classic ribbon wreath, wired ribbon is essential. That little bit of wire inside lets you bend, shape, and position each loop exactly where you want it, and crucially, it makes sure they stay that way. Also, double-check that you're twisting the ribbon or pipe cleaner very tightly onto the frame after you form each loop. This really helps to lock it securely in place.
How Can I Make My Wreath Look Fuller?
Ah, the ultimate goal: that luxurious, dense appearance that looks so professional. If your wreath is looking a bit on the sparse side, don't panic. There are several easy fixes to give it a real boost in volume.
Here are three effective strategies I often use:
- Add More Ribbon: This might sound obvious, but it’s the simplest fix. Just pack more ribbon bundles into each section of your wire frame. You could also cut your initial ribbon strips a bit longer to create larger, puffier loops from the get-go.
- Create a Base Layer: Before you even start with the ribbon, try wrapping the wire frame in a wide deco mesh. This base immediately adds bulk and is fantastic for filling in any potential gaps you might see between your ribbon clusters later on.
- Vary Your Materials: This is a brilliant trick for adding dimension. Try mixing ribbons of different widths and textures. For example, combining a wide 6 cm ribbon with a narrower 4 cm one creates incredible depth and visual interest, making the whole wreath appear much fuller.
What Is the Best Way to Store My Wreath?
Once you've made your beautiful creation, you'll want to keep it looking its best year after year. Proper storage is all about preventing the ribbons from getting crushed or flattened.
The ideal solution is a dedicated wreath storage box or a large, circular wreath bag. These are specifically designed to protect your work from dust and compression. If you don't have one, hanging it in the back of a wardrobe works too—just cover it loosely with a light plastic bag to keep it clean. When you bring it out again next season, a quick fluff of the loops is all it will need to look brand new.
Ready to start your next masterpiece? At www.Ribbonsforyou.com, we offer a vast selection of high-quality wired ribbons, wreath kits, and all the accessories you need to bring your creative vision to life. Find your perfect materials and get crafting today


 Facebook
 Twitter
 Pinterest