Easy Ribbon Bow Instructions for Perfect Bows
Tying the perfect bow is one of those simple skills that can make any gift, decoration, or craft project feel instantly more special. These ribbon bow instructions are here to walk you through creating everything from a quick and easy gift topper to a big, beautiful bow for a wreath. You'll be amazed at how a few simple folds can create something so lovely.
Why a Perfect Bow Makes All the Difference
A well-made bow is so much more than just a way to hold a package together. It’s the finishing touch that turns an ordinary item into something truly memorable. Think about it – that little detail shows you’ve put in care and effort, transforming a simple present into a real occasion.
It’s a timeless skill that connects us to a long history of beautiful presentation and celebration. Whether you're making a birthday present look extra special or adding a professional touch to your home decor, a good bow is a clear sign of quality and thoughtfulness. It’s what makes a gift feel truly complete.
A Rich Tradition in the UK
Here in the United Kingdom, ribbons and bows have a surprisingly deep cultural and commercial history. For centuries, they've been a key part of everything from fashion and haberdashery to all sorts of festive celebrations. This rich heritage is still alive today, thanks to companies that have been shaping the industry for generations.
Take Berisfords Ribbons, for example. Founded way back in 1858, what started as a small haberdashery supplier has grown into a global leader. They now provide decorative ribbons and bows for wholesale, craft, and luxury packaging markets. Their journey really shows the lasting appeal of a beautifully made ribbon.
The act of tying a bow is an invitation to slow down and appreciate the small details. It’s a craft that adds personal value and charm, whether you’re wrapping a gift for a loved one or adding flair to your home.
The recent love for luxury packaging and festive decor shows exactly why learning to tie a few different bows is such a rewarding skill. It's a practical craft with a surprisingly rich backstory, connecting you to a long tradition of making things beautiful.
Before you start, have a think about the look you're going for:
- For Gifting: A full, multi-loop bow is perfect. It adds a sense of excitement and makes the gift feel generous.
- For Decor: A structured bow made from wired ribbon will hold its shape beautifully on wreaths or as a tree topper.
- For Fashion: A delicate, soft bow can be a chic and timeless accessory on clothing or hairpieces.
Of course! Here is the rewritten section, crafted to sound like an experienced human expert and match the provided examples.
Choosing the Right Ribbon for Your Project
The secret behind any truly fantastic bow isn’t just about mastering the tying technique; it all starts with the ribbon itself. Picking the right material, width, and texture is your first, and arguably most important, step. The ribbon you choose will dictate the bow's structure, how it drapes, and its overall personality, so it’s well worth getting this bit right from the get-go.
Think about it this way: a delicate silk ribbon that looks gorgeous on a small jewellery box would seem completely lost and flimsy on a big, rustic front-door wreath. On the flip side, a stiff, wide ribbon perfect for that wreath would be far too bulky and awkward for wrapping a tiny, elegant gift. Every project has its perfect ribbon partner.
Understanding Ribbon Materials
The type of fabric a ribbon is made from determines how it behaves in your hands. Some are soft and fluid, creating gentle, drooping loops, while others offer a bit more backbone and memory, letting you build structured, perky shapes. Getting to know the main players will make your choices so much easier.
Here are a few of the most popular options and what they do best:
- Satin: Known for its classic, high-sheen finish, satin is perfect for adding a touch of luxury. It's my go-to for wedding gifts or formal occasions. It drapes beautifully but be warned—it can be slippery to work with!
- Grosgrain: This ribbon has a lovely ribbed texture that gives it fantastic structure. It’s much less floppy than satin, making it a brilliant choice for sturdy, flat bows or for projects that need a bit more grip.
- Organza: Light, airy, and often sheer, organza creates ethereal, delicate bows. I love layering it with other ribbons to add texture and volume without any of the bulk.
- Velvet: With its rich, plush feel, velvet instantly adds a sense of warmth and vintage charm. It’s an absolute favourite for festive and winter-themed bows.
The most versatile tool in any bow-maker's kit is, without a doubt, wired ribbon. The fine wire hidden along the edges lets you bend, shape, and fluff loops into the exact form you want—and they’ll stay that way.
This shape-holding ability is a complete game-changer, especially when you’re tackling larger, more complex designs like wreath bows or Christmas tree toppers. If you're after that professional, voluminous look, exploring a range of wired ribbons is an absolute must. The control it gives you makes achieving perfect, full loops so much easier, which is why it's a firm favourite among florists and professional decorators.
To help you decide, here’s a quick guide to some common ribbon types and where they really shine.
Ribbon Selection Guide for Bow Making
This table breaks down the most common ribbon types to help you choose the best material for your specific bow-making project.
| Ribbon Type | Best For | Handling Tips | Aesthetic |
|---|---|---|---|
| Satin | Wedding gifts, formal occasions, dressmaking | Can be slippery; use pins to hold it in place while working. | Luxurious, smooth, high-sheen, elegant |
| Grosgrain | Hair bows, gift wrapping, scrapbooking | Excellent grip, holds its shape well for flat, crisp bows. | Textured, sturdy, classic, matte finish |
| Organza | Layered bows, delicate gift wrap, floral work | Light and airy, can be tricky to tie tightly; great for adding volume. | Sheer, ethereal, delicate, lightweight |
| Velvet | Christmas and festive decor, vintage projects | The plush pile can make it bulky; best for simple, bold bows. | Rich, plush, warm, luxurious, vintage |
| Wired | Wreaths, tree toppers, large-scale decor | The wire allows for easy shaping and re-fluffing; very forgiving. | Professional, voluminous, structured |
Choosing the right ribbon is half the fun. Don't be afraid to experiment with different textures and materials to see what effects you can create.
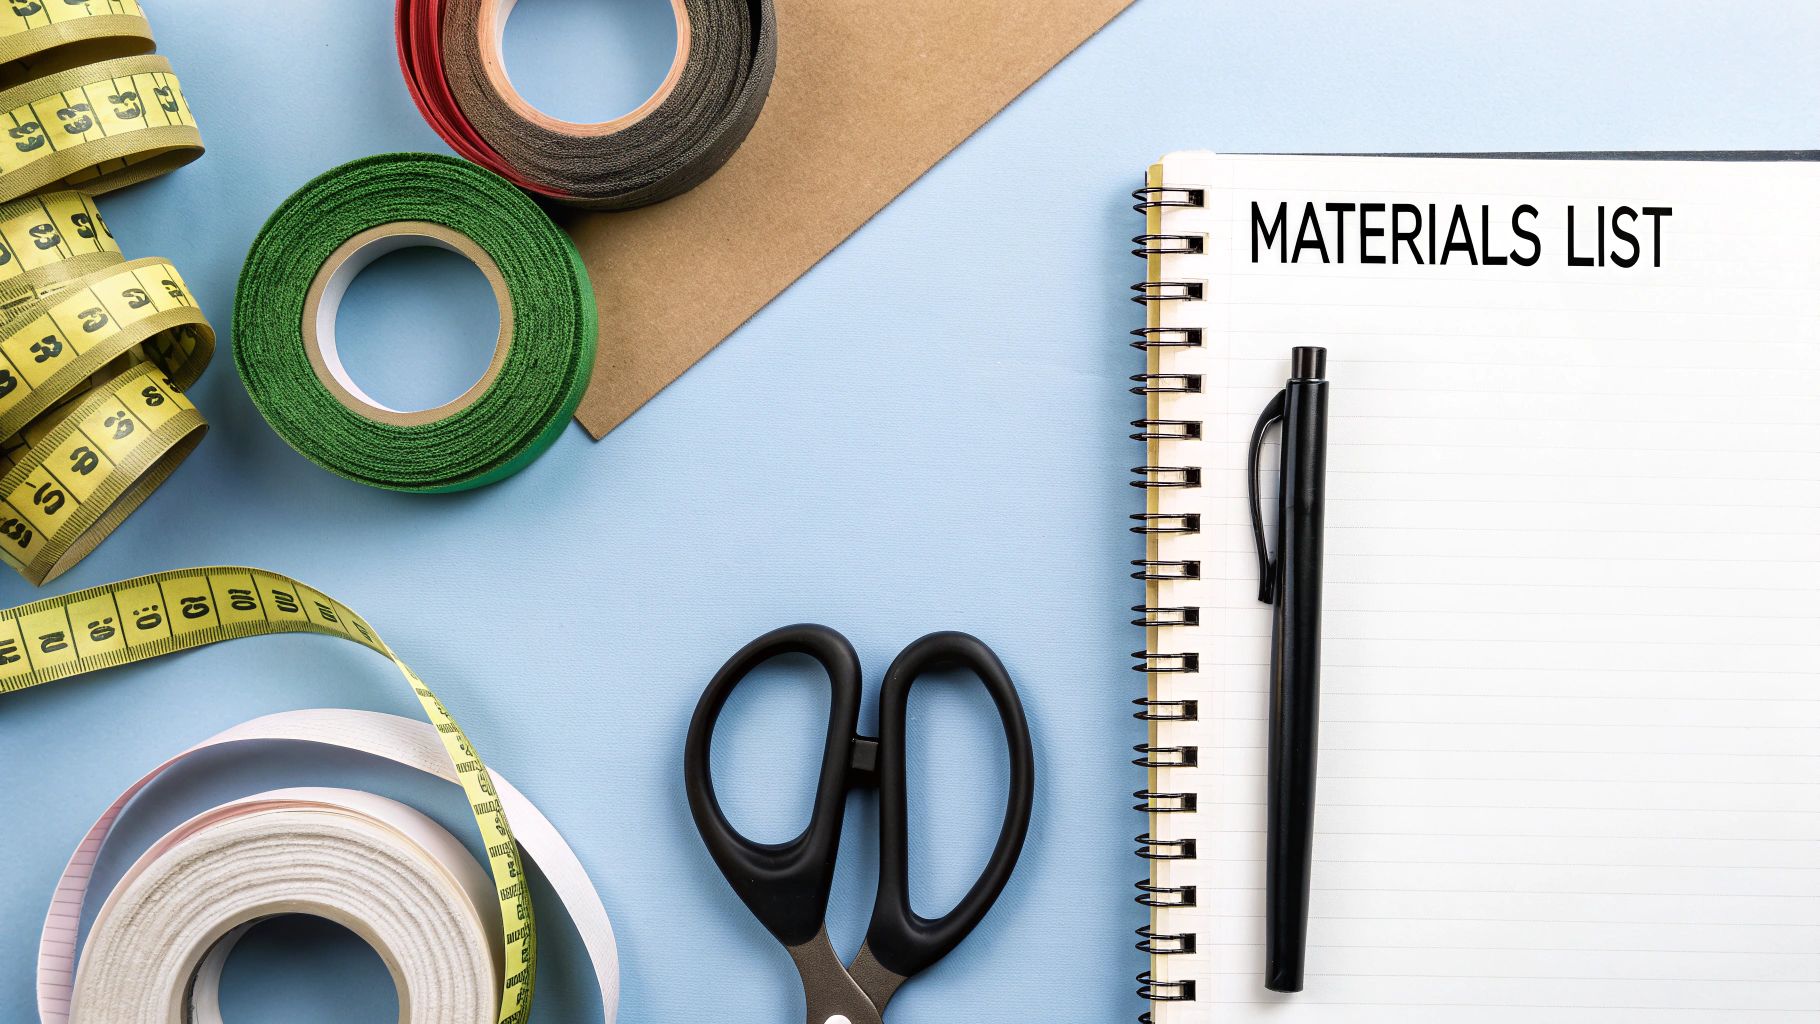
Calculating How Much Ribbon You Need
There’s nothing more frustrating than getting halfway through a beautiful bow only to realise you’re about to run out of ribbon. While there's no single magic number, a good rule of thumb can save you a lot of bother.
For a standard multi-loop gift bow that’s about five inches across, I’d suggest starting with 2.5 to 3 metres of ribbon. This should give you enough for 10-12 loops, the central knot, and two decent tails. For a big, show-stopping wreath bow, you’ll want to have 5 metres or more on hand, especially if you want long, dramatic tails that flow down the door.
My best practical tip? Always overestimate. It's far better to have a bit of ribbon left over for another project than to have to abandon your bow mid-creation.
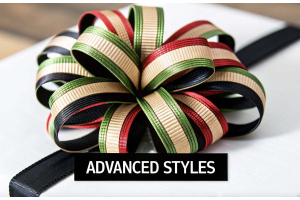
Mastering the Classic Multi-Loop Gift Bow
This is it. The big one. The foundational skill for anyone who wants to create stunning gifts. We’re talking about that gorgeous, full, and bouncy bow you see on perfectly wrapped presents in department stores. It might look like the work of a professional, but it’s surprisingly straightforward once you get the rhythm down.
Forget trying to follow confusing diagrams. The real secret is a simple, repeatable action. You’ll start by making a small loop right at the end of your ribbon, pinching it tightly between your thumb and forefinger. This central pinch point is your anchor – it’s where all the magic happens.
From that starting point, you’ll form a larger loop on one side and bring the ribbon back to the centre. Now, here’s the crucial part: before you pinch this new loop into place, give the ribbon a half-twist. That little twist is what keeps the shiny, "pretty" side of the ribbon facing outwards, which is absolutely key for a polished, professional-looking bow.
The Pinch and Twist Technique
Once you’ve twisted the ribbon, pinch it firmly right on top of your first hold. Now you’re ready to create a matching loop on the opposite side. Bring the ribbon back to the centre, give it that same half-twist, and pinch it down again. You'll just keep repeating this back-and-forth motion, stacking loops on either side of your thumb. With every new loop, you’ll feel the bow start to build volume and take shape.
For a standard gift box, I find that aiming for about five or six loops on each side gives a really lovely, full result. Just try to keep the loops roughly the same size as you go for a nice, symmetrical appearance.
This visual guide breaks down the basic motion for forming and securing a simple bow.
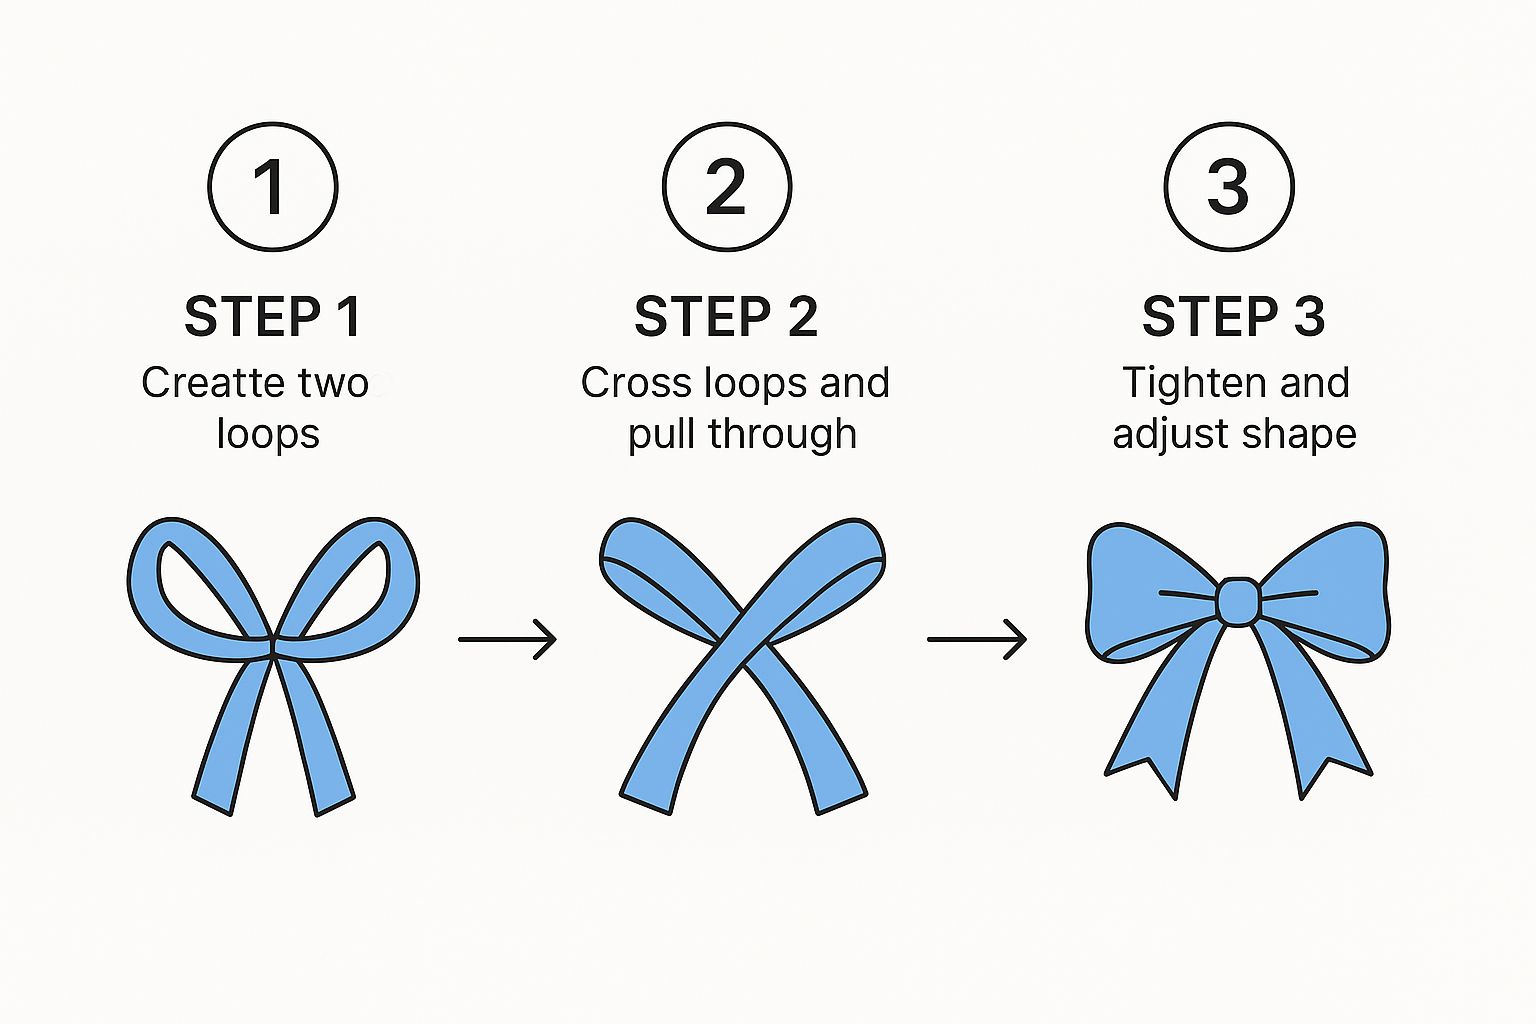
As the infographic shows, that final step of crossing and pulling the loops through is what creates that secure knot at the bow's heart.
Securing and Finishing Your Bow
After you’ve created all your loops, it’s time to lock it all in. The most important thing is not to let go of that centre pinch! Carefully take a thin piece of floral wire or even a smaller, coordinating ribbon and wrap it tightly around the pinched centre. Twist the wire several times at the back to make sure everything is held securely in place.
Once it’s secured, you can finally let go and start the best part: the fluffing. Gently pull the loops apart, separating and arranging them to create a full, rounded shape. If you've used wired ribbon, this is where you can really have some fun defining the shape of each individual loop.
A common mistake I see is not pinching the centre tightly enough. A firm, consistent grip is what gives the bow its structure and stops the loops from slipping or looking floppy. Don't be afraid to hold on tight!
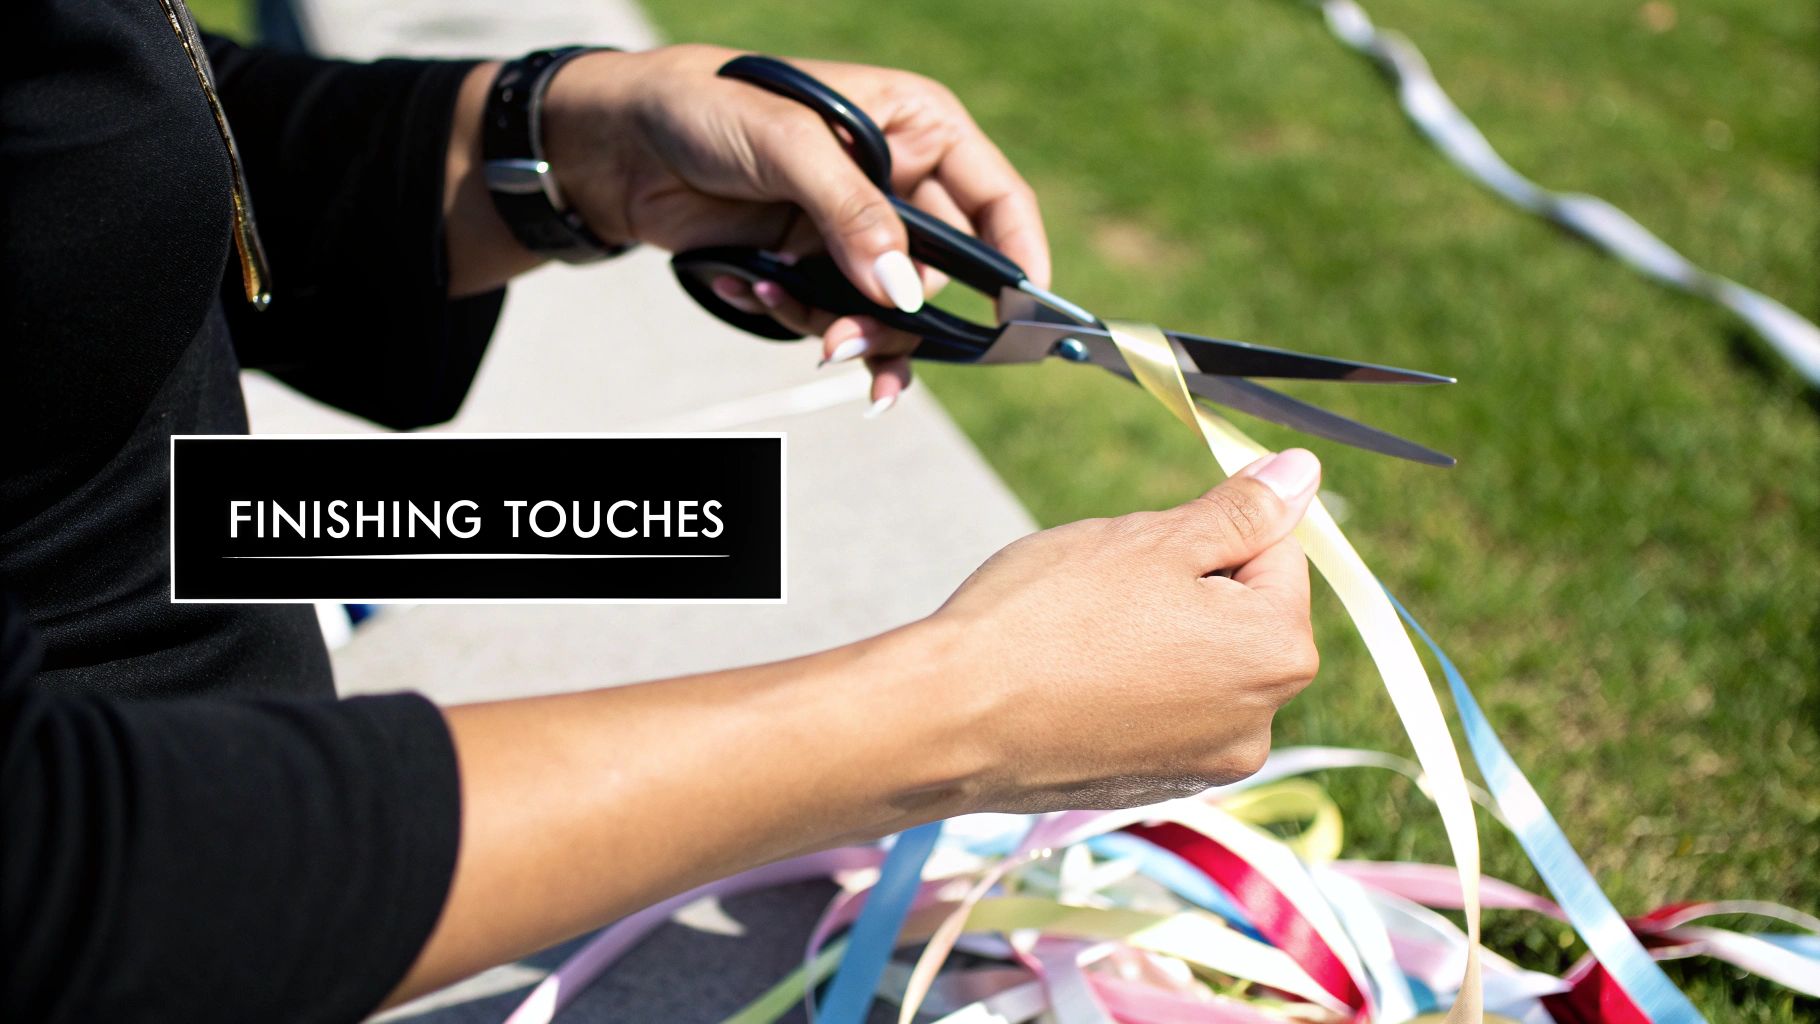
Finally, you need to trim the tails for a clean finish. A classic 'dovetail' or 'v-cut' always looks professional. Just fold the end of the ribbon in half lengthwise and snip upwards at a 45-degree angle from the folded edge towards the outer edge.
For those of you making lots of bows for an event or for Christmas, you might want to streamline the process. You can learn more about how to make a feature bow using a bow maker, a handy tool that helps create perfectly consistent loops every single time.
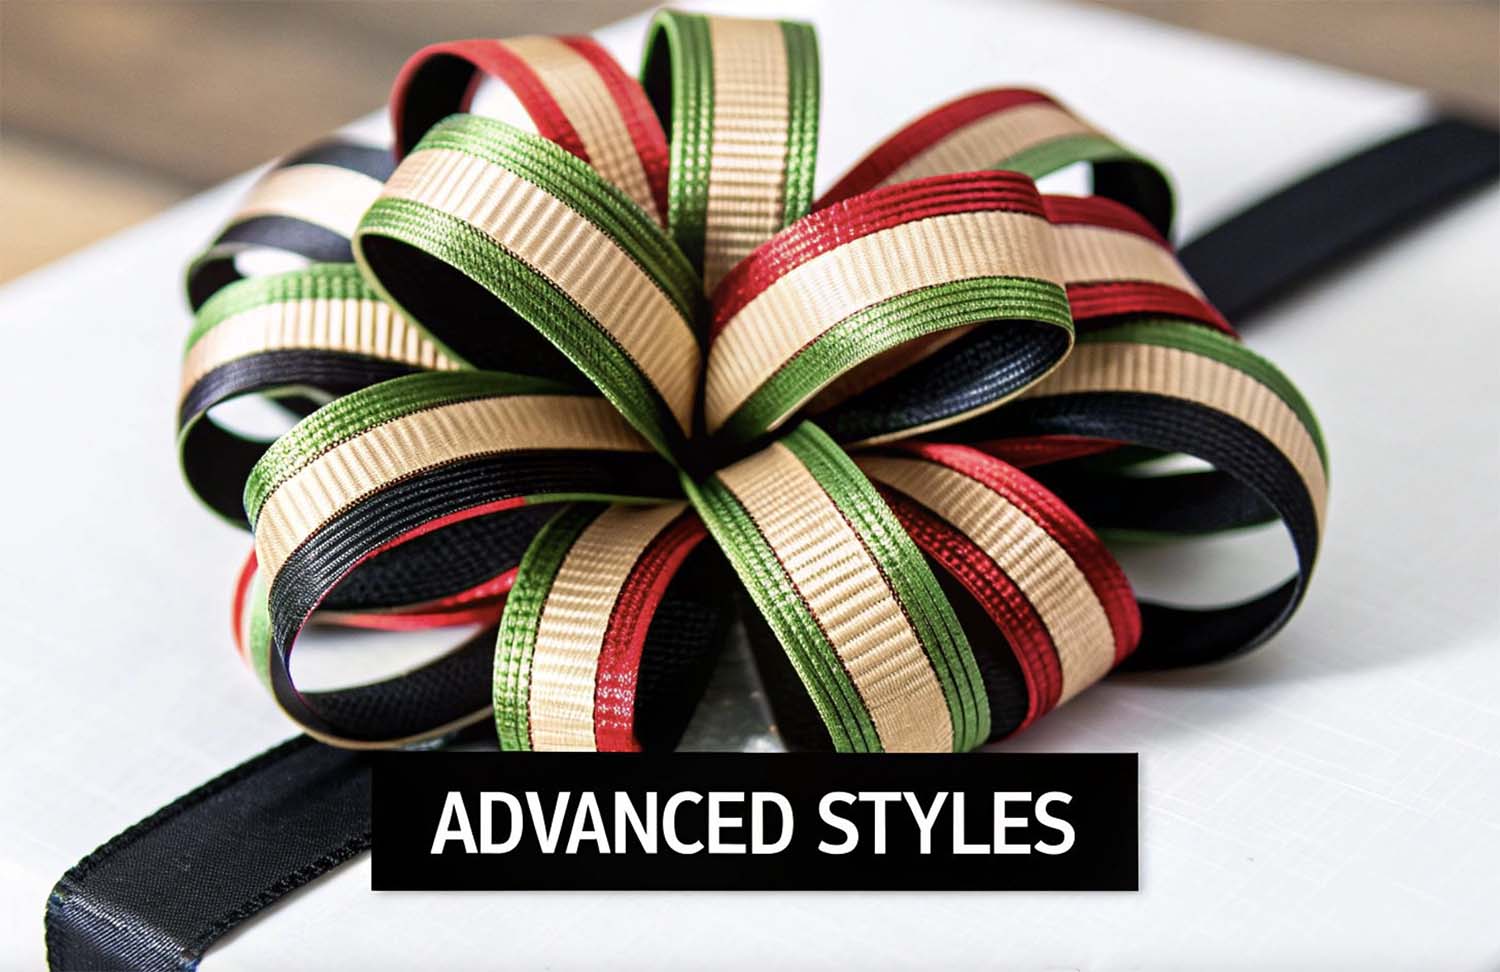
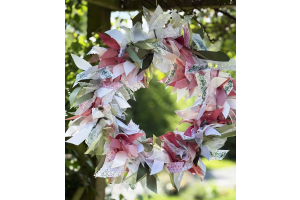
Crafting a Show-Stopping Wreath Bow
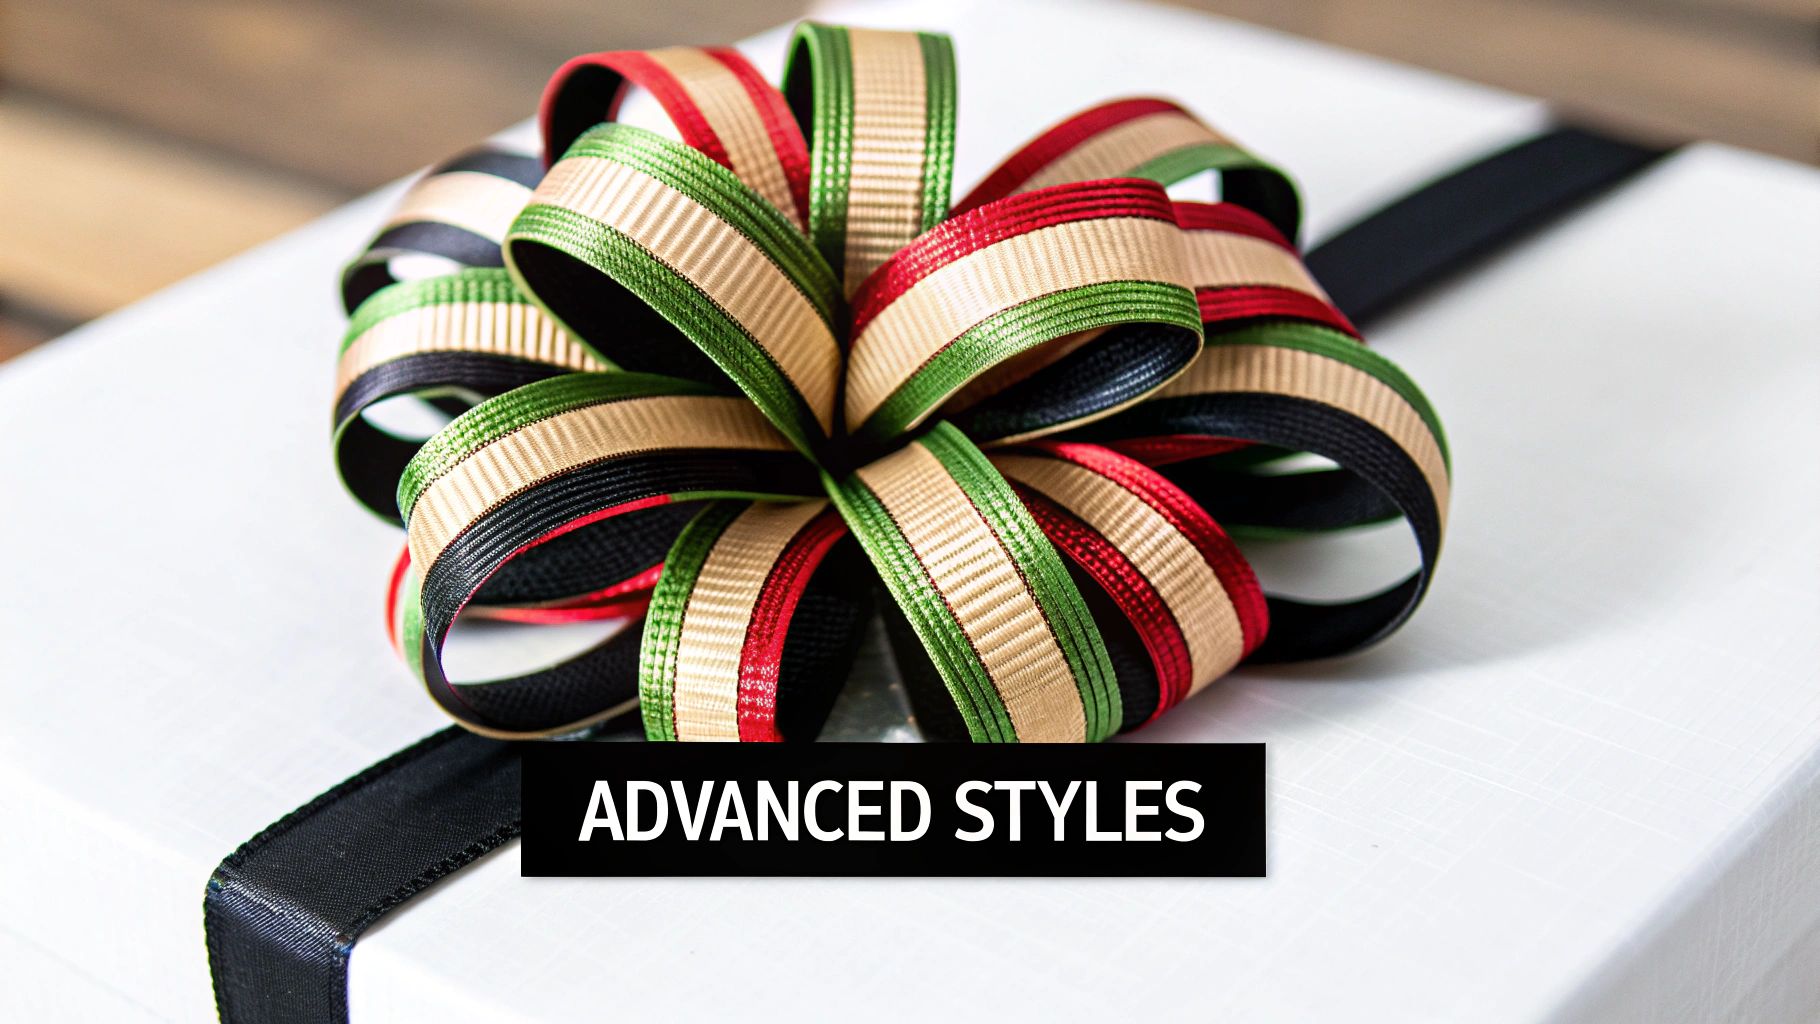 Now for what many consider the main event in home decorating—the magnificent wreath bow. This isn't just another bow; it's a real statement piece. It’s what sets the tone for your festive decor, welcomes your guests, and adds that professional polish to a front door or mantelpiece.
To get this look, you absolutely have to use wired ribbon. I can't stress this enough. It’s the only way you'll get those big, voluminous loops and dramatic, cascading tails that give a wreath bow its wow factor. Anything else will just end up looking limp and disappointing.
Building Your Foundation
The method for making a wreath bow is a lot like the multi-loop gift bow we talked about, just on a much bigger scale. You'll be making loops in graduating sizes to create real depth and volume. For a standard 24-inch wreath, I’d grab at least five metres of a wide, wired ribbon to start.
First, decide how long you want your tails. Don't be timid here—long, flowing tails are a key part of the look. Once you've measured out your first tail, make a small starting loop and pinch it tightly between your thumb and forefinger. This is your anchor point.
Now, it's time to create your first and largest set of loops, one on each side, using that pinch-and-twist technique. These loops form the back of the bow, so they need to be the biggest. I usually make these about six to seven inches long.
Layering for Volume and Drama
With your base layer of two large loops in place, you can start building forward. Create your next set of loops, but this time, make them just a little smaller than the first pair. Pinch them securely right on top of the first set, holding everything together at your central anchor point.
You'll want to repeat this process at least once more, making a third pair of loops that are even smaller still. It’s this graduation in size that gives the bow its full, beautifully layered appearance.
The real secret to a professional-looking wreath bow is securing it properly. Instead of a thin ribbon, use a durable floral wire or even a zip tie. Wrap it tightly around the pinched centre and twist it several times at the back, leaving the ends of the wire long. This wire is what you'll use to attach it to the wreath.
The trend for big, decorative bows has really taken off in UK home styling. In recent years, statement bows have become one of the biggest Christmas decoration trends, with luxurious velvet and patterned ribbons popping up on doors and trees to create a wonderfully nostalgic feel. You can read more about this popular Christmas decor trend on Country Living.
Attaching and Fluffing Your Masterpiece
Once your bow is tightly secured with wire, the fun really begins. Because you’ve used wired ribbon, you can now fluff and shape it to perfection. Gently pull the loops apart, separating the different layers and rounding them out with your fingers until you have a full, gorgeous shape.
Use the long ends of the floral wire to attach the bow directly onto the frame of your wreath. Just thread the wire through the wreath's branches and twist it tightly at the back to hold it in place. This method is so much more stable than trying to tie it on with another piece of ribbon.
For that final professional touch, trim your tails. A classic dovetail cut always looks fantastic, or you can cut them at a sharp angle for a more modern finish.
If you’re planning on making a few wreaths and want everything in one place, have a look at our convenient ribbon wreath kits. They come with all the materials you need for a stunning result.
Right, let's get those hair bows looking fabulous. From the playground to the runway, a beautifully tied bow is a classic way to add a bit of charm to any hairstyle. It's a simple little craft, but making your own means you can create something that perfectly matches an outfit or a mood. Hair bows are having a massive moment again, and they’re definitely not just for kids anymore.
The trend has really taken off across the UK fashion and beauty world. You'll see high-profile celebrities making hair ribbons their go-to accessory for everything from a casual day out to a red-carpet event. It just goes to show how versatile this classic style really is. If you want to see just how it’s being styled, you can read more about the celebrity-led hair bow movement on Cosmopolitan UK. All this popularity makes knowing how to tie your own even more worthwhile.
Creating a Chic Flat Bow
The flat bow is a wonderfully simple yet chic style, and it’s perfect for attaching to a hair clip or a headband. If you're new to this, it's the ideal place to start. A more structured ribbon, like grosgrain, or even a soft velvet works beautifully for this design.
First, cut a length of ribbon. The longer you cut it, the bigger your bow will be. For a nice medium-sized bow, a piece around 20-25 cm is a good starting point.
Lay your ribbon out flat, then bring both ends into the middle so they overlap slightly. You should have two loops and two tails, looking a bit like an awareness ribbon. Fiddle with the loops until they’re even and the tails are the length you're happy with.
Now, pinch the very centre where the ribbons cross over. This is the crucial part that creates the classic bow shape. Grab a needle and thread or a piece of fine-gauge wire and wrap it tightly around that pinched centre a few times to hold everything in place. To finish it off, you can hide the thread or wire by wrapping a smaller, matching piece of ribbon around the middle and securing it at the back with a dab from a hot glue gun.
Tying a Petite Looped Bow
If you're after a fuller, more traditional bow shape, the petite looped style is perfect. The technique is a lot like tying your shoelaces, but it takes a bit more finesse to get the proportions looking just right. Satin or silk ribbons are fantastic choices here, as their softness creates really lovely, delicate loops.
Start by making two loops (or "bunny ears") with your ribbon, making sure to leave a tail on each side. Cross the right loop over the left one. Then, take the loop that's now on top, wrap it around the back of the other loop, and poke it through the hole that’s formed in the centre.
The real secret to a beautiful looped bow is to pull it tight slowly and evenly. Gently tug on all four ends—the two loops and the two tails—at the same time. This is your chance to adjust the size of the loops and the length of the tails until they look perfectly symmetrical and balanced.
Once you’re pleased with the shape, give the knot one final, firm pull to lock it in. All that’s left is to trim the tails. A sharp pair of scissors is a must! You can snip them at an angle or with a classic V-shaped dovetail cut to stop them from fraying and give your bow a polished, professional finish. This small but mighty bow can then be sewn or glued onto clips, headbands, or even clothes for a charming bit of decoration.
Got Questions About Making Ribbon Bows? We’ve Got Answers
Even with the clearest instructions, you're bound to hit a few tricky spots when you’re learning to make bows. It happens to the best of us! From loops that just won’t stay perky to ends that seem determined to fray, these little hiccups can feel incredibly frustrating.
But don’t throw your ribbon across the room just yet. For every common problem, there’s usually a simple, straightforward fix. This section is all about tackling those frequent questions, giving you the troubleshooting tips you need to perfect your technique and get the beautiful results you’re after.
How Do I Stop My Bow Loops Looking Flat and Uneven?
Ah, the dreaded droopy bow. This is probably the number one frustration for crafters, but the solution usually comes down to two things: the ribbon you’re using and your handling technique.
For big, bouncy bows—the kind you see on wreaths or statement gifts—wired ribbon is your best friend. That fine wire running along the edges isn’t just for decoration; it’s what allows you to physically shape and fluff each loop into a perfect, full circle after the bow is tied. It’s incredibly forgiving and the secret to a professional finish.
What if you're using a classic, non-wired ribbon like satin? The magic is all in the 'pinch and twist' technique.
- As you form a loop and bring it back to the centre point, give the ribbon a firm half-twist right where your thumb and finger are pinching it.
- This tiny movement does two things: it forces the shiny, "right" side of the ribbon to always face outwards, and it adds a surprising amount of tension and structure.
- This tension is what stops those loops from collapsing in on themselves.
A little tip from experience: always make your loops slightly bigger than you think you need. The process of securing the centre and fluffing everything up will naturally tighten the bow, making the loops a touch smaller.
What Is the Best Way to Cut Ribbon Ends So They Don’t Fray?
Nothing ruins the look of a gorgeous bow faster than messy, frayed ends. Thankfully, a couple of simple methods will give you a clean, long-lasting finish every time.
The most popular and elegant finish is the 'dovetail' or 'v-cut'. It looks smart and helps minimise immediate fraying. Just fold the tail of your ribbon in half lengthwise. Then, using a pair of sharp scissors, cut from the folded side upwards towards the outer edge at about a 45-degree angle. When you unfold it, you’ll have a perfect, symmetrical notch.
For synthetic ribbons like polyester, satin, or grosgrain, you can create a permanent, fray-proof seal with a little heat. Very carefully and very quickly, pass the freshly cut edge through the blue part of a lighter’s flame. It will instantly melt and seal the fibres. Always test this on a scrap piece first and be extremely cautious!
This heat-sealing trick is an absolute game-changer for projects that will be handled a lot, like hair accessories, keeping them looking crisp for ages.
How Much Ribbon Do I Really Need?
Running out of ribbon halfway through a bow is a classic crafting tragedy we’ve all experienced. While the perfect amount depends on the bow's style and your desired size, it helps to have a reliable starting point.
For a standard multi-loop gift bow that’s about five inches across, I’d recommend starting with 2.5 to 3 metres of ribbon. This gives you plenty for about 12-14 loops, a neat central wrap, and two lovely tails. If you’re aiming for a big, show-stopping wreath bow, plan on using at least 5 metres, especially if you want those dramatic, cascading tails.
Here’s a pro tip I swear by: decide how long you want your tails to be before you start. Measure out that length from the end of the spool and set it aside. Then, begin making your loops. This way, you guarantee you won't have to sacrifice your tails at the end. It's always better to have a little too much ribbon than not quite enough.
At Ribbons4u Ltd, we believe the right materials make all the difference. From luxurious velvets to versatile wired ribbons, we provide everything you need to bring your creative visions to life. Explore our extensive collection and find the perfect ribbon for your next project at https://ribbonsforyou.com.


 Facebook
 Twitter
 Pinterest